Wednesday, 9 February 2022

How to Create a Website Structure That Enhances SEO and Boosts Your Rankings

How to Create a Website Structure That Enhances SEO and Boosts Your Rankings

The better and more logical your site structure, the greater UX, SEO, and other benefits you’ll see. Deciding how your website should be structured takes time and careful thought.

In this guide, you’ll learn what website structures are and why they’re important. We’ll dive into the four types of website structures and how you can choose the right one for your site.

Finally, we’ll show you just how to design and develop the right structure for your site.

What Is Website Structure?

Website structure refers to how information is laid out on your site, the way it is designed, and how the pages connect with one another.

Some of the top reasons why visitors leave a website is due to poor site structure. 73.1 percent of people said they leave a site with a non-responsive design and and 34.6 percent said it was due to poor content structure.

Websites have a short window to make an impression otherwise visitors will go somewhere else.

Many elements go into a good website structure which includes taxonomies, internal links, breadcrumbs, navigation, and schema.

Why Is Your Website Structure Important?

There are three major reasons your website structure is important.

First, a logical and well-planned structure is ideal for User Experience (UX). 88 percent of online consumers say they are less likely to return to a site after a bad experience. Websites that are easy to navigate create a seamless experience for your audience without frustrations.

Second, and perhaps of the same importance as the first point, is Search Engine Optimization (SEO). More than 25 percent of SEO professionals believe structured data is an emerging SEO factor and 36.6 percent believe Google’s Core Web Vitals update is going to become one of the most important components to an SEO strategy in the future.

Making sure your website is well-laid-out, easy for search engines to crawl, and mapped properly will make it easier for your content to be indexed.

Lastly, an intentional structure helps prevent keyword cannibalization. This means content that covers similar topics will be distinguished and organized from one another, giving users and crawl bots a clear idea of the intention for each piece.

Top-Down Vs. Bottom-Up Website Structures

The four types of website structures fall into two categories: top-down or bottom-up.

Different structures satisfy different goals and there are pros and cons of each approach.

A challenge with top-down structures is everything needs to be planned out from the start. Once it is established, it’s impossible to change the overall flow and website setup.

On the flip side, this logical structure will make it easier for both users and search engine crawlers to navigate your pages.

As for the bottom-up website structure, its main strength is that it can be built over time and let you continue making adjustments. Even though these structures are better for a website owners, they might make the experience more difficult for users and search engines.

The 4 Types of Website Structure

Below is a breakdown of the four main types of website structures used today with use cases on when each one is more appropriate.

1. Hierarchical

A hierarchical structure, sometimes referred to as a tree structure, is the most popular website structure. It moves from larger, more general category pages into smaller, individual pages.

An example of this is with e-commerce websites that have high-level product categories (e.g., shirts) that flow into smaller categories (e.g., t-shirts, blouses, knits) that flow into individual product pages.

Hierarchical structures are great for websites with large amounts of data like e-commerce. First, you would establish your informational pages and other categories that would be important to your visitors. A good place to start is with the pages that receive the most traffic.

From there, you would determine how the rest of your pages fit amongst those categories. Always make sure you approach this in a way that makes sense for users and crawl bots since it will be very challenging to change this later.

2. Sequential

A sequential, or linear, website structure is one that follows a simple page-to-page path. These are more common for simple websites or when creating a campaign with multiple landing pages.

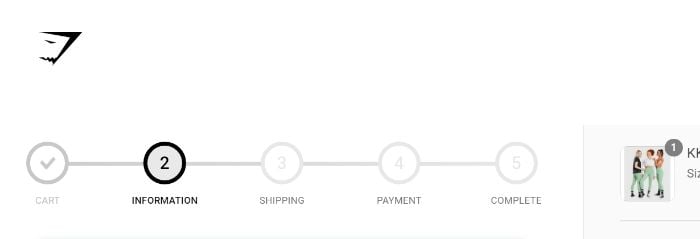
If you’re a startup or a small business, you probably only have a few essential pages you want to display so this approach would make sense. This would even make sense for large website checkout experiences like Gymshark or KKW Beauty have done:
website-structure-gymshark

The best use for this structure is when you want your content to have a chronological order. For example, an online course or sales funnel. A sequential website structure will ensure users go through the steps as you intend to make the process as straightforward as possible.

To get started with this structure, look for areas of your website where having a logical sequence would help improve the user experience. This could be through your checkout process, highlighting benefits of your offerings, or for specific content topics.

3. Database

A database structure is one of the most complex website structure types using a bottom-up approach.

This approach requires special attention to tagging and metadata in order to create a searchable database for users to access. Site search is becoming more and more popular and can be a valuable tool for increasing conversions.

About 30% of people who visit a website will use the site search at some point. Another previous study from eConsultancy found that when site search works well, those visitors convert almost twice as much.

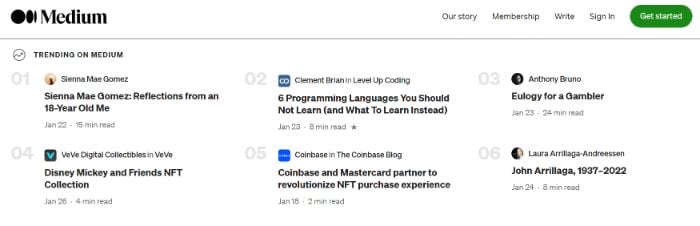
An example of a database structure is Medium:
website-structure-medium

A big advantage from a database structure is that it can be personalized to meet your needs. It can also be built over time since it is bottom-up so you don’t need to worry about making it perfect right away. As your website grows, your previous database files will become part of their own dataset under the new, larger structure.

One challenge with a database structure is you will need someone on your team with extensive programming knowledge. This is an important part to make sure nothing gets lost in translation.

The first thing you should consider is the level of data your website has before using this structure. If there’s a fit, find an experienced website programmer who can help guide you in the right direction and start strategizing categories.

4. Matrix

A matrix structure is one of the oldest structure types on the internet. It’s complex and non-traditional that is best navigated using search and internal links.

Wikipedia is a prime example of a matrix structure. There are seemingly endless possibilities for the next steps a user can take and with more than 80 percent of their traffic coming from organic searches, it works.

Following a wiki-style approach is the most obvious use of a matrix structure. It lets you present a large amount of data and information in a word cloud-like format. You don’t need to worry as much about a parent-child relationships for pages or navigation. The next step in the sequence would depend on each user.

This structure should mainly be considered when a website has a narrow focus as broad topics might be overwhelming for users. For example, this would make sense as a training database for company systems or fan-based websites for popular TV shows.

To get started, list all the pages that might connect with each other and look for logical opportunities where you can link between them.

How to Pick Which Type of Website Structure Is Right for Your Website

The website structure you choose will largely depend on the type of website you’re building. While you can choose whatever structure you’d like for your website, it is best to choose one that aligns with your core ideas and how visitors expect to interact with your site.

For websites that have a lot of data and where clear categories exist, then a hierarchical or database structure might be your best bet.

If you want to deliver bite-sized chunks of data in chronological order, then the sequential structure is an easy choice.

As for the matrix structure, following a wiki-style approach is really the best solution. This makes the most sense for sites with a lot of content or links that can connect together.

7 Tips for Designing and Developing Your Website Structure

Before we get into the steps you should take to create a great website structure, we’re going to touch on some of the nuances of design and development.

This is important to consider from a user experience perspective.

1. Optimize Your Site for People, Not Bots

In recent years, there is less of a gap between website optimization best practices for people and bots than ever before. Some website owners are still more focused on optimizing for crawl bots instead of people though. While this is never a bad idea, keep in mind you are trying to keep people engaged in order to increase conversions.

Almost 40 percent of people will stop engaging with a website if the content or layout is too confusing.

2. Keep Links on Any Given Page to a Reasonable Number

It’s crucial to balance on-page time and link interactions. You want users to be engaged by the content of a current page, but you also want to encourage them to go deeper into your site.

The key to this balance is keeping links to a reasonable number and also make sure the link connects with the topic at hand.

So what is the ideal number? This topic has been debated endlessly in the SEO community. A safe number to aim for is three to five links per 1,000 words to get started. The important part is not overloading each page.

3. Utilize Heading Hierarchy

The structure of your website is important, but so is the structure of individual web pages.

When you utilize a heading hierarchy, you create a logical structure for your web pages that both humans and bots can understand.

A heading hierarchy helps you organize on-page content using different heading elements (e.g., H1, H2, H3, H4). These elements are fairly simple to implement and easy to organize while improving the readability of each page.

You can also test different header types to see what sort of impact they have on individual page engagement.

4. Keep Navigation Depth Shallow

No matter what kind of site you have, your users should be able to find what they need in as few clicks as possible. According to Google’s John Mueller, click depth carries more weight for SEO than the URL structure.

While there’s no hard-and-fast rule on the exact number of clicks, try to keep the navigation depth to four clicks or less.

5. Show Breadcrumbs

Speaking of navigation, you want to make it as easy for customers to navigate backwards as forward. The best way to do this is with breadcrumbs.

According to research from the Baymard Institute, breadcrumbs do a lot of the heavy lifting on mobile sites yet 36 percent of sites that use them fail to include the full category hierarchy on mobile product pages.

At the same time, 20 percent of desktop sites and a massive 65 percent of mobile sites don’t use breadcrumbs at all on their product pages. This is a pretty big gap that can confuse users since they don’t know where they are on the site or how to navigate from there.

Breadcrumbs make it a lot easier for users to navigate back to higher-level category pages or even your homepage in just a few clicks.

6. Keep up on Keyword Research

If there’s one thing equally important as the website structure, it’s content.

In order to produce content that resonates with your audience, you need to perform keyword research at each stage of the development process to ensure all pages are optimized.

According to Ahrefs, close to 95 percent of all keywords get 10 searches or less per month. It is very important to choose the right ones if you want to get traffic.

Where do you begin? Use a keyword tool like Ubersuggest to choose the right terms. It offers extensive keyword data, insights to improve traffic and backlinks opportunities. 

7. Include Schema Markup

To take your website’s architecture to the next level, consider using structured data.

Structured data includes tags, JSON code, and rich data which was created for and understood by search engines. Using structured data has been recommended by Google since 2014. It can drastically improve website visibility with some sites reporting as much as 400 percent increase in rich result organic traffic.

If you’re looking for the most bang, then start with schema markup. This can be implemented quite easily compared to JSON, and there are plenty of schema markup guides to get you started.

How to Plan a Website Structure

What goes into the development and design of a website structure? Below is a step-by-step guide to planning your website’s structure.

Step #1 – Perform Market Research

There’s nothing wrong with innovating how you approach your website structure. However, it should be an intentional decision.

Pay attention to how similar websites in the market structure their sites before you choose your own. This can be a signal for what user expectations are and you don’t want your site to confuse them.

Before you begin planning, select the top five to 10 competitors in your market, go through their websites to see what structure they use, and identify the strengths and weaknesses of their setup.

Step #2 – Develop and Analyze Your Target Audience

Even more important than the competition is your target audience. Before making a decision, you should know who your audience is, what sites they visit, and what they expect from the user experience on your site.

Don’t rush this step of the planning process. This is the greatest opportunity to learn how your visitors navigate through competitor sites. Once you have identified the strengths and weaknesses, you can make improvements so your website delivers a much better experience.

Steph #3 – Choose Your Website Structure and Hierarchy

Now is the moment of truth. It’s time to use the information you received from your market and audience research to pick the right structure type for your website.

This would also be the right time to bring an experienced UX/UI designer into the mix if you’re still not sure which structure makes sense. They can provide valuable insights to your internal developers even if they aren’t a part of the entire project.

Step #4 – Choose a URL Structure

The best URL structure will closely mimic the website structure you chose. What does this mean?

Let’s say you chose a hierarchical structure for your website. Within it there are high-level category pages, low-level category pages, and product pages. A simple and effective URL structure would look like:

https://ift.tt/Dg90Kol

This URL structure offers a logical path for users to follow. It’s very similar to the breadcrumb navigation that many hierarchical websites use.

What about the URL structure for a matrix-style website structure? With so many internal links, it would be impossible to create a logical URL structure like the one shown above. In these cases, a workaround would be using a simple direct link to the page topic. Here’s an example of how Wikipedia does it:

website-structure-wikipedia

Step #5 – Develop an Internal Linking Strategy

Think of internal links as a way to tell a cohesive story on a particular topic, with the added bonus of giving users another way to navigate your site.

As mentioned before, there should be a purpose behind each internal link you use and not overdo it. The goal is to provide value to users, not bombard them with more information.

Step #6 – Create a Sitemap File

If you want search engines to crawl your website quickly and efficiently, you need a sitemap.

A sitemap file is a map search engines can use to navigate your website. It tells crawl bots which pages are important and how they are connected to each other.

Fortunately, the process for creating and submitting your sitemap is quick—it usually takes less than 20 minutes. 

Step #7 – Run User Testing

The job’s not done once the website is live. In fact, the journey is just beginning.

Running regular tests can help you uncover issues with your current setup. While this step won’t necessarily impact the website structure you chose, it can highlight key areas you should revisit.

This will help you answer questions like:

  • Where are users getting stuck in the journey?
  • Are there certain elements (e.g., navigation, site search) users find difficult?
  • What steps in the customer journey can be improved?
  • Does your current setup have any bottlenecks?

It’s not uncommon to run user testing several times as you implement changes to your website based on user feedback. Keep testing and keep optimizing.

Website Structure Frequently Asked Questions

What is a linear website structure?

A linear website structure displays content in sequential order from one page to the next. The best example of this is the checkout process on sites like KKW Beauty.

Which is the best type of website structure for SEO?

When it comes to SEO, the best website structure is hierarchical. This is a logical structure that is easy for search engine bots to crawl.

How many types of website structures are there?

There are four main website structures: hierarchical, sequential, database, and matrix.

Who is qualified to design a website's structure?

A website developer is your best bet when it comes to designing and developing a website’s structure. They may work alongside other professionals, like UX/UI designers.

Conclusion: Website Structure

Website structure impacts your UX and SEO, which means it’s crucial for getting traffic and your overall online success. With a lot of planning and thoughtful organization, you can create a website structure that enhances SEO and boosts your rankings. 

The best structure is the one that works for you and your audience’s needs. Whether you choose hierarchical, sequential, database, or matrix, make sure to keep user experience, SEO, and market research in mind. 

Which of the above tips for designing and developing your website structure did you find most helpful?


from Neil Patel's Digital Marketing Blog https://ift.tt/WLpG2QV
via IFTTT

How to Get on the Instagram Explore Page

When it comes to Instagram, getting on the Explore page is a surefire way to gain more exposure. Through the Explore page, you can maximize your reach and get your content in front of relevant users and potential customers. That means more views and impressions and possibly more Instagram followers.

How can your brand make the most of this prime real estate and get on the Instagram Explore page? Let’s find out.

What is the Instagram Explore page?

The Explore page on Instagram is a collection of content based on a user’s individual interests. The Instagram algorithm curates content based on similar accounts or content interacted with. The Explore page includes photos, videos, Reels and even Stories. Instagram curates the content on this page to the taste of each user, so no two Explore pages are alike.

Instagram users access the Explore page by tapping on the magnifying glass icon at the bottom of the app screen.

Instagram Explore Page with a search of "space"

Source: Instagram

From the top search bar, you can use keywords to find popular content, accounts and tags related to a specific topic.

You can further filter the results according to niche categories. For example, the Explore page for “DIY crafts” shows more filters to narrow down your search by material or medium. This helps Instagram users get specific with their searches. As a business owner, it can give you ideas on what type of content your customers are looking for based on the search results Instagram returns.

Why the Instagram Explore page matters to your brand

Your brand should care about getting on the Instagram Explore page because it means more people may see your content. With Instagram projected to have nearly 1.2 billion monthly active users by 2023, this increased visibility will have several related benefits:

  • Increased followers: More than 200 million accounts visit the Instagram Explore page daily. That’s 50% of the platform user base. And among these users, Instagram will display your content in front of those who are most likely to be interested in your account. This means you have a good chance of turning some of them into new followers.
  • Increased engagement: If users like the content they see, they’re likely to engage with it by liking, commenting or even sharing with friends. So when they discover your content through the Explore page, it could boost engagement for your brand.
  • Increased sales: When more people discover your content through the Explore page, it helps get your products in front of the right people. Moreover, your shoppable Instagram posts can also show up in the Explore page. More people discovering your products could translate to an increase in sales.

How the Instagram Explore page algorithm works

Instagram uses a Feed Ranking System to personalize each user’s feed and Explore page. The Explore page algorithm relies on machine learning to collect ranking signals and decide what to display. It uses an “unconnected recommendation system,” where the platform chooses posts based on each user’s activity on Instagram.

The Instagram algorithm then ranks these posts based on several factors. These factors include engagement, freshness, content quality and relevance.

Visual representation of connected recommendations and unconnected recommendations used in the Instagram algorithm

To sum up, Instagram personalizes the Explore page based on:

  • Posts that are fresh and see a ton of engagement
  • The types of content you regularly engage with
  • Accounts that you’re already following
  • The types of posts that see engagement from people you follow

For example, let’s say you follow a lot of food accounts and engage with Reels related to cooking. In this case, Instagram will collect popular food-related content for your Explore page.

The ranking system is currently based on relevance and interaction. As long as they meet the necessary criteria, Instagram equally favors content from all types of accounts. This is great news if you’re running an Instagram business account. It means you stand as good a chance of getting on the Explore page as an influencer or a personal account.

5 tips on how to get on the Instagram Explore page

With millions of posts created every day, visibility on Instagram is very competitive. This also makes it challenging for posts to show up in the Explore page. Use the following best practices for Instagram to improve your chances:

1. Share engaging content

Engagement is one of the major ranking signals that the Instagram Explore page algorithm looks for. Creating engaging content is easier said than done. Take a look at your existing content and your target audience. What types of Instagram content do they engage with the most? A quick Instagram audit can help you with these discoveries.

Ideally, your content should have two main qualities – it should be useful and it should catch the eye. Does your content add value? Does it help your followers achieve anything or solve a problem? Or perhaps it informs and educates them. You could even create content just to entertain them if that aligns with your brand personality.

2. Get inspiration from other posts on the Explore page

If you’re not sure how to create engaging content, look at what types of content usually make it to the Explore page. This can inspire you to create the kinds of posts your target audience is engaging with. It can show you what approach is working for other accounts relevant to your industry so you can get inspired and craft your content strategy.

Perhaps people are enjoying bite-sized how-to videos. Or maybe infographic carousels seem to see high levels of engagement. Do you see more “before and after” transformations than regular customer stories?

Make a note of the winning “recipes” and find a way to use them for your own Instagram content strategy.

3. Perfect your timing for optimal engagement

Timing is an important factor when it comes to getting engagement on social media. With thousands of new content coming up every minute, your post could get lost in the feed if it doesn’t see immediate engagement. The key to tackling this problem is by posting when your followers are most likely to see it.

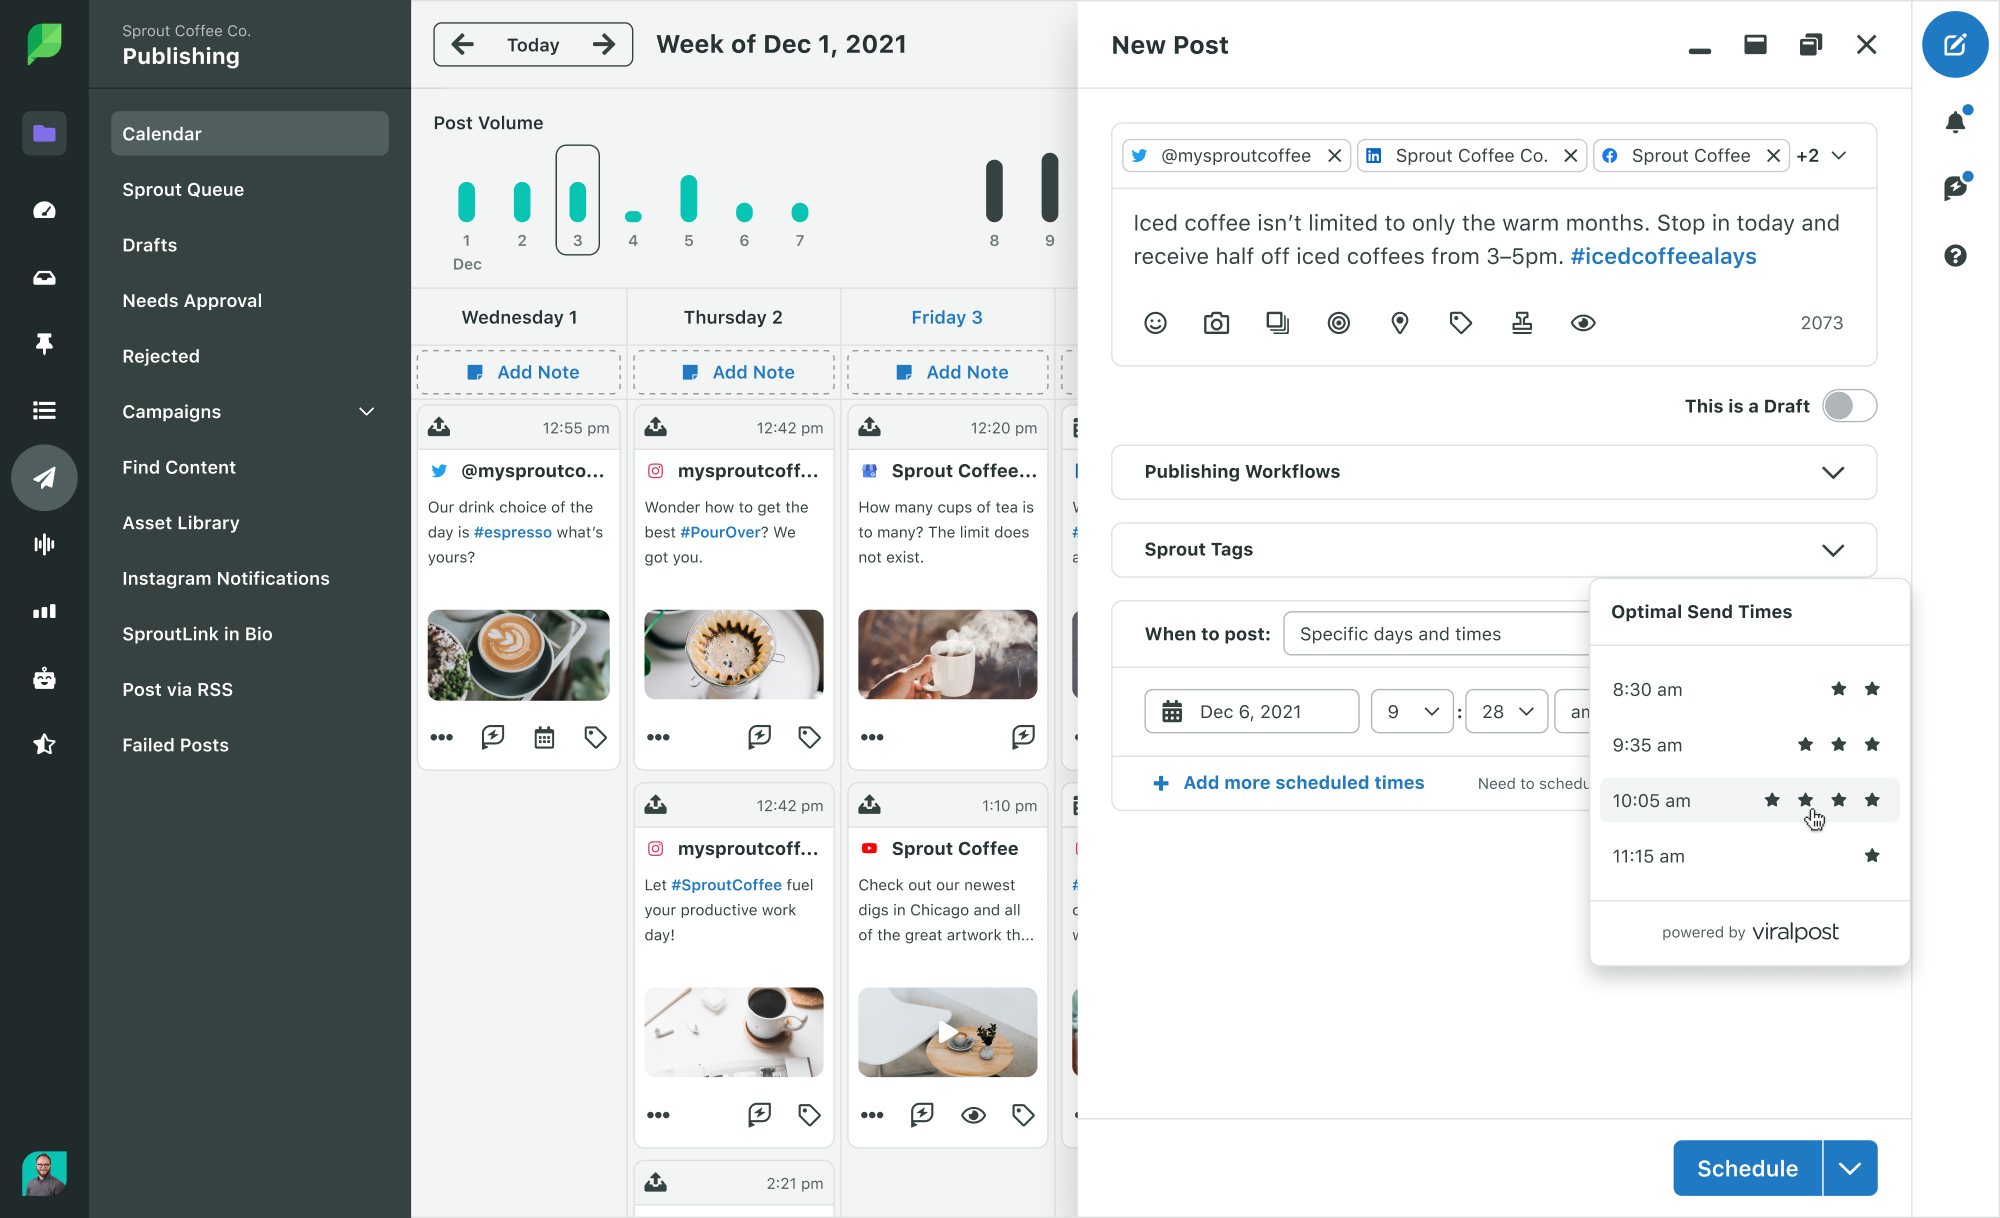
The best time to post can vary by location, industry and audience. So take a look at how your own followers are behaving to understand when to publish your content. A platform like Sprout Social makes it easy to find your best times to post. With the Optimal Send Times feature Sprout uses engagement data from your profiles to identify the best times to post for the most audience engagement.

Sprout Social has an optimal send time feature that uses engagement data to recommend your best times to post on any given day.

 4. Keep things fresh with new formats

When Instagram introduces new content formats, it tends to display these formats prominently for users to engage with. Notice how Reels have a dedicated tab on the Instagram app. It’s because Instagram wants the feature to succeed.

Creating Reels improves your chances of driving engagement and organic reach. It can also help diversify your feed, allowing you to keep your audience interested and engaged. Beyond Reels, make sure you experiment with other content formats as well. This can include Stories, carousels and shoppable posts. Ideally, take a look at the trending content format right now and then leverage it for your own strategy.

For example, Sprout’s Instagram account regularly switches up formats to include videos, carousel infographics, employee spotlight photos and Reels keep the feed diversified.

5. Consider investing in paid ads

Reaching audiences through organic posts can be hard, so it helps if you can amplify your efforts with some paid ads. Instagram allows you to run ads in Explore, which prominently displays your content to users browsing the Explore page.

Keep in mind that these ads won’t guarantee you a spot on the main Explore page. But they will appear when a user clicks on one of the posts from their Explore page and scrolls down. This still significantly improves your content visibility. And it allows you to reach relevant users even if you haven’t made it to their organic Explore page.

Earning your place on the Instagram Explore page

More than 157 million Instagram users are in the US and are the second largest audience group by country. So leveraging the Explore page gives you the potential to reach millions of new and relevant users.

The good news is that getting on the Instagram Explore page doesn’t have to be rocket science. Using the right blend of good content, timing and fresh content formats can get you ahead of the race. But to perfect your approach, you need to have a better understanding of what your audience wants to see from you.

Want to know what consumers expect from brands on social? Download the Sprout Social Index, Edition XVII: Accelerate to discover valuable insights about social consumers.

The post How to Get on the Instagram Explore Page appeared first on Sprout Social.


from Sprout Social https://ift.tt/yxgDKMV
via IFTTT

Tuesday, 8 February 2022

E-commerce Optimization: 6 Steps to Boost Your Conversion Rates

E-commerce Optimization: 6 Steps to Boost Your Conversion Rates

For online stores, increasing conversions is the key to long-term success.

After all, if visitors don’t buy, then you’re not making any money! And with $7.31 trillion dollars projected to be spent on e-commerce retail by 2025, you want to make sure to optimize your CRO so you can receive as much of that spend as possible.

That said, optimizing your e-commerce store can be confusing.

Even if you’ve done everything right, from driving traffic to your website to running digital ads, you might still see low conversion rates. The average conversion rate for US e-commerce stores was 2.8 percent in the second quarter of 2021 (which is the most recent data available).

So what gives, and how can you push past a three percent conversion rate? E-commerce optimization is all about making it easy for your visitors to buy from you.

How do you do that? It starts with diving into your analytics to see where visitors are getting stuck. If that sounds complicated, don’t worry—I’m going to walk you through it.

First, however, let’s talk about why CRO is different for e-commerce websites.

How Is Conversion Optimization Different for E-commerce Stores?

Conversion rate optimization (CRO) for e-commerce stores is different because e-commerce stores sell physical products, which can be more complex and time-consuming to purchase than, for example, a service – which has an average 9.3 conversion rate across the industry.

The difference in average conversion rates is partially because a service website might have one or two steps in the checkout process, while an e-commerce store could have five or six – meaning it’s all the more important for you to optimize your CRO.

This means e-commerce stores need to pay more attention to the purchase process, from product pages to the checkout page.

E-commerce stores have unique friction points, such as shipping and returns, which can impact purchase decisions.

Because of this, e-commerce owners need to take a holistic approach to optimizing their stores.

This might mean looking for opportunities to increase customer confidence through social proof and streamlined checkout processes.

Ultimately, e-commerce owners should focus on creating a frictionless purchase experience to boost their conversion rates.

E-commerce CRO Strategy #1: Add Recommended Products

Adding recommended products to your e-commerce store is a great way to increase conversion rates.

When someone visits a product page, they want information about the product and how it can meet their needs.

If you suggest additional products that might be of interest, you can help guide their purchase decision and increase your conversion rate.

Invespcro found that 37 percent of shoppers clicked a recommended product during their first return visit to a site.

Similarly, shoppers that click on product recommendations are four and a half times more likely to add items to the cart and complete a purchase.

Amazon, for example, recommends products based on previous purchases or items you looked at. This helps keep customers engaged with the site and increases sales.

They also use “Frequently Bought Together” prompts to show customers related items they may like.

Recommending relevant products to your customers also improves the personalization of your e-commerce store.

86 percent of consumers say website personalization affects their purchasing decisions. This is an e-commerce conversion rate optimization tactic you don’t want to miss out on.

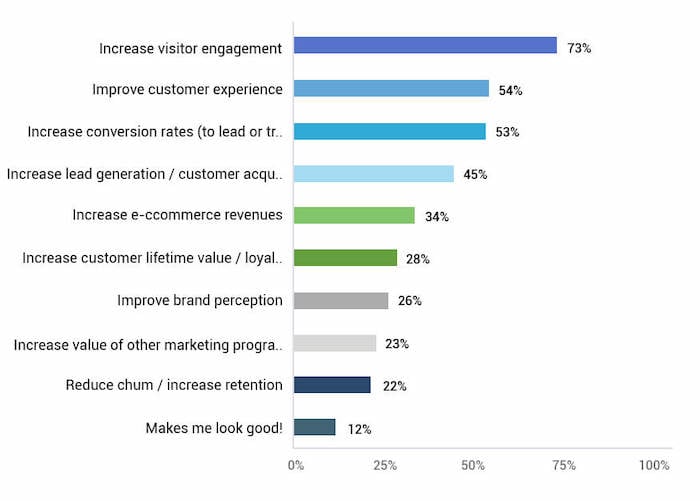
ecommerce conversion rate optimization graph

You can add recommended products in several different ways. Some examples include:

  • adding recommended products at the purchase stage, somewhere above or under their shopping cart
  • adding recommended products in the confirmation/transaction email you send to customers when they make a purchase
  • add recommended products on search results pages for similar/related products

The steps for adding recommended products will vary based on your e-commerce platform. Here are instructions for the most popular platforms:

E-commerce CRO Strategy #2: Make Sure Your Product Pages Shine

High-quality product pages are key to your e-commerce success.

When customers can see what they’re buying and get an idea of how it will look and function in their lives, they feel more confident about the purchase.

Since your visitors can’t touch and feel your products, you need to make sure the media you use on each product page does them justice.

Start with high-quality photos that depict the product from various angles at different levels of detail.

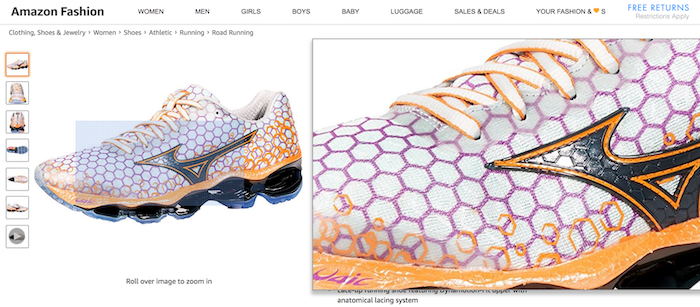
Make sure your photos are high enough resolution to support a zoom feature to show texture and details.

product image of shoe for ecommerce optimization

If you have the space, add a 360-degree view of the product so customers can get a complete look.

360 product image of car for ecommerce optimization

If your e-commerce store sells clothes or accessories, use models to show how the items look on various body types.

Besides images, consider using demo videos or explainer videos to show your products in action.

Remember, you don’t have to generate all the content yourself either.

Encourage customers to submit visual content or source your images and videos from social media, which perform double duty as social proof, which will help increase conversions.

Product descriptions that highlight key features are also key to getting shoppers to buy.

Be sure to include all pertinent information, such as size, color, and fabric content.

Use clear and concise language to avoid confusion and highlight the unique features of your products.

E-commerce CRO Strategy #3: Streamline Navigation

You can’t make sales if site visitors can’t find what they want.

Your site’s navigation is often the first place shoppers look if they have a specific product or category in mind.

Navigation that is confusing, too complex, or difficult to understand will cost you sales and customers. In fact, a HubSpot case study found that simplifying or removing navigation elements from middle-of-the-funnel landing pages resulted in a 16-28% increased conversion rate!

There’s no one-size-fits-all solution for e-commerce website navigation. The best way to design a website menu depends on the nature of your products and how your customers like to organize information.

Here are a few steps for creating effective e-commerce website navigation:

  1. Use heat maps or do user testing to find how and where users click.
  2. Prominently display categories on every page.
  3. Include clear labels and concise descriptions for all menu items.
  4. Create intuitive and logical menus based on how your customers browse your site.
  5. Avoid burying essential menu items in nested sub-menus.
  6. Test different navigation structures to see what works best for your customers.

An example of great e-commerce navigation comes from Apple.

If you have a large number of products, a drop-down menu that lists everything can be overwhelming.

If Apple included all its products and services in a drop-down menu, its website would have very clunky and confusing navigation.

Not only would that work against the brand’s minimalist image, but it’d also be hard for customers to find what they need.

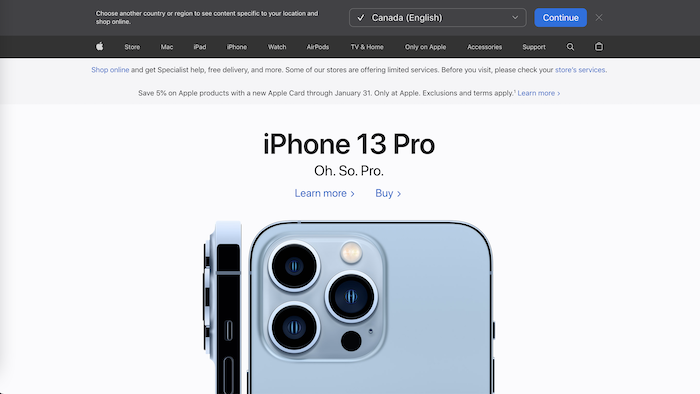
Instead, Apple opts for clean top navigation with no dropdown or secondary menu item:

ecommerce optimization - apple homepage

When visitors click on a top navigation item, they’re directed to a menu page that lists options within the category:

ecommerce optimization - apple menu navigation

Doing away with a complicated drop-down also helps streamline the mobile user experience, which is increasingly important.

Clear navigation also has SEO and UX benefits.

Providing a clear path to the products customers are looking for makes it easier for shoppers to find what they need on your site—which increases sales.

This can help improve your search engine ranking, as Google (and other search engines) favor sites that are easy to navigate.

If you’re unsure if your site is easy to navigate, or have seen drop-off points in your analytics, consider using a heat map tool like Crazy Egg to see where people click on your pages.

You can also use a tool like Optimizely to test different versions of your navigation and see which one leads to more conversions.

Once you’ve identified any potential drop-off points, it’s time to start making changes!

E-commerce CRO Strategy #4: Add a Wish List or Favorite Option

Wish lists and favorite options allow users to save items they might buy later.

This is a great way to increase conversions because it gives users the opportunity to “test drive” your site and come back later to buy products they love.

Creating a wish list also requires customers to create an account for your e-commerce store.

This allows you to offer relevant promotions and gather customer data to improve user experience and increase sales.

Wish lists can help you:

  • alert customers about special offers available for items on their wish lists
  • deliver targeted content based on items they’ve shown interest in
  • identify retail trends and seasonal activities to improve demand forecasting
  • understand what your customers are looking for and offer similar products
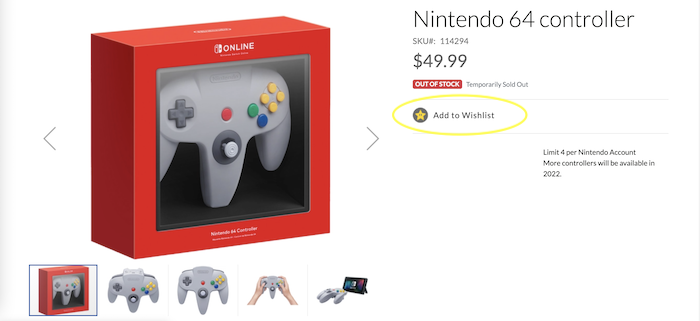
Nintendo ecommerce optimization wish list

Research from Google found 40 percent of online shoppers think their experience would be better if they were offered a wish list.

In addition, make it easy for your customers to create wish lists on other platforms. For example, enable “Pin It” buttons so visitors can share your products on their Pinterest wish lists.

Or, promote the use of the “Save” feature on Instagram and Facebook.

There are many ways to make it easy for your customers to save products they are interested in.

If you use Shopify as your e-commerce platform, you have two options for adding a wish list feature: add custom code to your site, or add a wishlist app, like Wishlist Hero.

On BigCommerce, all you need to do is enable wishlists in your shop’s settings.

WooCommerce offers an extension so you can allow users to add items to their wishlist when they shop your store.

E-commerce CRO Strategy #5: Streamline the Check Out Process

According to the Baymard Institute, 69.82 percent of e-commerce carts are abandoned at checkout.

This rate increases on mobile and desktop devices, which have some of the highest cart abandonment rates.

Cart abandonment rates by device:

  • desktop: 66.1 percent
  • mobile: 80.6 percent

To avoid losing customers at the checkout, make the process as quick and easy as possible.

This means offering clear and concise shipping information, providing a guest checkout option, and ensuring all payment methods are available.

You should also ensure the checkout process is easy to navigate with all required information requested upfront.

Here are a few ways to streamline the checkout process:

  • Use a single-page checkout: This will keep customers from going through multiple pages to check out.
  • Save billing and shipping information: Customers hate having to enter their information each time they make a purchase, so make their checkout process easier by saving and auto-filling their information.
  • Use a progress bar: Let customers know how far along they are in the checkout process so they don’t get impatient.
  • Offer a shipping calculator: This will help customers determine how much their shipping will cost and whether or not they want to continue with the purchase.
  • Personalize page to their local currency: Customers feel more comfortable when they’re making a purchase in their local currency.
  • Reduce clicks: Try to make the checkout process straightforward, so customers don’t get frustrated and leave.
  • Provide order confirmation: Once a customer has completed their purchase, send them an order confirmation to let them know everything went through successfully.
  • Include trust symbols: Add trust symbols like security seals to reassure customers their information is safe and their purchase is legitimate.

Remember, the easier you can make it for customers to buy, the more likely they are to convert!

E-commerce CRO Strategy #6: Add More (and Better) Social Proof

Social proof is one of the most powerful tools at your disposal to boost e-commerce conversion rates.

Adding social proof elements to your site increases confidence in potential buyers and nudges them towards completing a purchase.

Some effective ways to add social proof include testimonials from happy customers, reviews from unbiased third-party, or user-generated content of your product in action.

According to Trustpilot, 89 percent of global consumers read online reviews before making a purchase.

This implies reviews are a regular part of a consumer’s purchase journey, but they can also be a deciding factor in the purchase process.

That said, reviews don’t just exist on your product pages.

Other digital channels such as social media, email marketing, and even paid search can be used to display reviews.

For example, brands that work with influencers can benefit from video and social posts that include reviews.

This can include YouTube reviews, unboxing videos, or branded TikTok promotions.

There are a few things you can do to increase your reviews, including:

  • asking customers for reviews after purchase.
  • making it easy for customers to leave reviews on your site
  • including social media icons on your product pages that link to your profiles
  • using review aggregators like Trustpilot and Bazaarvoice
  • reaching out to influencers for social content creation
  • promoting UGC on your social channels

Frequently Asked Questions About E-commerce CRO Strategies

How can I improve my e-commerce conversion rate?

To increase your e-commerce CRO, consider adding recommended products, making sure your product pages shine, implementing simple navigation, providing a wish list option, streamlining the checkout process, and adding social proof.

How are e-commerce conversions calculated?

E-commerce conversions are the total number of visits to your e-commerce site divided by the number of purchases.

What is a good e-commerce conversion rate?

The average e-commerce conversion rate varies depending on the type of product you sell but is typically around two percent. Some of the top e-commerce sites have conversion rates between 5 and 10 percent.

What is CRO in e-commerce?

E-commerce conversion rate optimization, or CRO, is the process of making adjustments to your site with the goal of increasing the percentage of visits that result in a purchase. In e-commerce specifically, CRO is focused on optimizing the product page, checkout process, and overall user experience.

Conclusion: E-commerce Conversion Optimization

E-commerce conversion optimization is key to driving growth for your business.

While blogs and service sites rely on traffic from search engines and social media, e-commerce sites need to optimize SEO and every step of the buying process.

When starting an e-commerce conversion rate optimization strategy, start by looking into your customer data and website analytics. Use heat mapping tools to see where customers are clicking and what they scroll past.

Once you understand what is and isn’t working, start making changes to your website.

Test each change to make sure it improves conversion rates before rolling out the change to all visitors.

What CRO strategies have you used to boost e-commerce sales?


from Neil Patel's Digital Marketing Blog https://ift.tt/4uIl2bH
via IFTTT

How to hide likes on Instagram

illustration of like bubbles

In an attempt to make user's experience more pleasant, Instagram rolled out the ability to hide like and view counts on all posts in their feed. This way users can focus on the content, rather than the popularity of the content.

This update also gave users the option to hide the like and view counts on their own posts from other users. You can hide the like and view count on a post before you post it or you can do so retroactively.

We will walk you through how to hide Instagram likes on your feed and on your own posts.

How to hide likes on other accounts:

1. Open your Instagram profile

2. Select the three black lines in the upper right corner

screenshot of instagram app settings
Select the three black lines to begin the process of hiding likes on your feed. Credit: Screenshot: Instagram

3. Select "Settings"

screenshot of instagram app settings
Tap "Settings" to hide likes on your feed. Credit: Screenshot: Instagram

4. Search for posts and select "Posts"

screenshot of instagram app settings
Select "Posts" to hide the likes on your feed. Credit: Screenshot: Instagram

5. Turn on "Hide Like and View Counts"

screenshot of instagram app settings
Turn on "Hide Like and View Counts" Credit: Screenshot: Instagram

How to hide likes on your Instagram post before you share it:

1. On the final page before you post your Instagram photo (where you write your caption and tag accounts), scroll down and select "Advanced Settings" in grey.

screenshot of instagram app settings
Select "Advanced Settings" to hide likes on your Instagram post. Credit: Screenshot: Instagram

2. Turn on "Hide Like and View Counts on This Post"

screenshot of instagram app settings
Tap the white circle to hide like and view counts on your post. Credit: Screenshot: Instagram

How to hide likes on your Instagram post retroactively:

1. Go to the post you want to hide likes on

2. Tap the three gray dots in the right hand corner of the post

3. Select "Hide Like Count"

screenshot of instagram app settings
Select "Hide Like Count" to hide the number of likes on your Instagram post. Credit: Screenshot: Instagram

After hiding like counts beneath a post it will say "liked by one user and others."

This is your sign to hide likes on your Instagram.

This post was originally published in July 2021 and was updated in February 2022.

More Instagram tutorials:

How to delete individual photos from a carousel on Instagram

How to change your camera tools setting on Instagram

How to use voice effects on Instagram Reels

How to disable Instagram embeds (and why you should)

How to post a photo to multiple Instagram accounts at the same time

How to clear your Instagram search history

How to post Live Photos on Instagram

How to delete individual photos from a carousel on Instagram

How to turn your social profiles into hubs for charity

How to create an "Add yours" story on Instagram

How to hide photos on Instagram without deleting them

How to see your 'Least Interacted With' on Instagram

Related Video: How to not get your social media hacked


from Mashable https://ift.tt/NB34qwS
via IFTTT

How to supercharge your media relations strategy with social

Of all the emails you receive per day, how many do you ignore?

If you’re like most people, chances are you ignore more than half of what reaches your inbox. Journalists, as you might assume, are in the same boat. If they read and responded to every single email they received, there’d be no time to actually write.

So to get a journalist to read your pitch, it needs to stand out. Cold outreach may have worked in the past but now securing coverage from target outlets requires a more intentional approach.

That’s where your media relations strategy comes in. There’s an art to forming successful, mutually beneficial relationships with outlets and journalists. It relies on keeping your efforts compelling, creative and personal. You don’t need to be well connected or have access to a fancy database to pull this off. You just need to spend more time on social media.

Social can take your media relations efforts and elevate them so your brand becomes impossible to miss. Keep reading to find out how social is changing the media relations games and for tips on how you can use it in your strategy.

What is media relations?

Media relations is the art of developing and managing relationships with reporters and media outlets. These contacts are a crucial link between your brand message and the public that you’re trying to reach. Making sure these relationships are healthy and mutually beneficial can help your pitches stand out in inboxes and DMs.

To create a mutually beneficial media relations strategy, aim to make reporters’ lives easier. Scrap anything that’s too self-serving and focus on crafting interesting, culturally relevant pitches. As you continue to build relationships with reporters, you’ll be able to refine your outreach strategy for more success.

Why social media needs to play a role in your media relations strategy

Social has become a center point of people’s daily lives. It’s where they go for information, entertainment or to share what’s on their mind.

To put it simply, social is where culture happens.

It’s also the secret sauce that can take your media relations strategy from good to great. In a 24-hour news cycle, stories have a shorter shelf life than ever before. Social can help you keep your pitches relevant and newsworthy. It can also help you build and maintain more personal relationships with reporters. The opportunities are endless.

3 media relations examples with a social media spin

Now that we’ve covered some basics, let’s see how three brands have used social to complement their existing media relations practices.

1. NAACP’s Tweetments

The NAACP may have been founded in 1909, but their approach to media relations is as modern as they come.

After attempting to navigate the pandemic and a surge of Jim Crow-era racism, their team quickly realized that traditional approaches to social media and public relations weren’t working anymore. Vanessa Mbonu, the NAACP’s Vice President of Digital Marketing & Communications, calls the new strategy “social media relations.”

This combined approach helps the NAACP communications team amplify their message to as many people as possible. Social helps leaders at the organization move quickly and boldly, creating messages that stand out to journalists and supporters alike.

“Like me and my team, reporters spend a lot of their time online, so in a sense, we’re meeting them where they are,” says Mbuno.  “Instead of a reporter reaching out to ask what the official statement from the NAACP is, or relying on them checking their crowded inbox, it’s on Twitter, right where they needed it.”

2. Duolingo’s IPO

By now, you’re probably aware of Duolingo’s stellar TikTok strategy. Their hilarious short-form video content has made a huge impact on the company’s brand awareness, but that’s not the only network they’re using to create buzz.

Take their recent IPO for example. On Twitter, Duolingo made the event into a full-day affair complete with custom video content, animations and an event hashtag.

This steady drumbeat of content offered quite a few different angles reporters could use to cover the IPO, from the company’s overall mission to founder’s perspectives on why going public made sense for the company. Their team turned what could have been a simple announcement post into something more interesting and perfectly primed for media pick-up.

3. Patagonia’s statement on voting rights

Patagonia is no stranger to making a statement. Their approach to values-driven innovation has kept them going above and beyond in the name of corporate social responsibility. Whether they’re trying to reduce environmental harm or calling on politicians to make systemic changes for equality, they’re used to speaking up and speaking out.

Recently, the brand shared a statement from their CEO on Twitter urging senators to pass the Freedom to Vote Act. The goals of the bill, which supports equitable access to ballot boxes, and its meaning to the brand are clearly explained in a screenshot of the CEO’s full statement.

Patagonia has over 550,000 followers on Twitter alone. By sharing the statement directly to their social profiles, they give their audience a chance to hear directly from the brand rather than through sound bites.

4 ways to boost your media relations strategy with social

1. Build better relationships with journalists

Building a relationship with a media contact is a lot like building a relationship with a new friend. If you wanted to make a new friend, you wouldn’t only reach out when you need a favor, right?

Apply the same logic to potential media connections. Take the time to get to know who you’re pitching to. Read their work, get to know what they like to write about and engage with their content regularly.

Social media is the key to passively building these relationships over time, in a way that’s not overtly sales-focused or insincere. Journalists use social as a tool to connect with sources and to promote their work. This is your opportunity to better understand what catches their eye so you can catch theirs.

Start on Twitter. The network is an indispensable research and promotional tool for many journalists, so it’s a great spot to focus your efforts. Here are some tasks you can build into your daily routine to start building your media contact list:

  • Use Twitter Lists: Twitter Lists allow you to organize and prioritize the Tweets you see in your timeline. Make a List of priority media contacts so you can easily keep track of their posts and work.
  • Engage with their content: With Twitter’s character count, you won’t feel pressured to write any lengthy responses to their work. A simple “nice work” or a comment on something that stood out to you will do. Bonus points if you Retweet it for extra exposure.
  • Offer help: Journalists often use Twitter to put out feelers for sources or additional information. Use this as an opportunity to offer ideas or to connect them with someone who might be able to help.

2. Vet potential media outlets

Not all media coverage is created equal. Some publications have larger followings or followings that are more aligned with your target audience. The only way to validate whether or not a media outlet is a good fit for your brand is to do research.

You could look to see what topics they cover and how often, or you could try to dig up their circulation numbers. But, if you want a more data-backed media relations process, social should be your go-to.

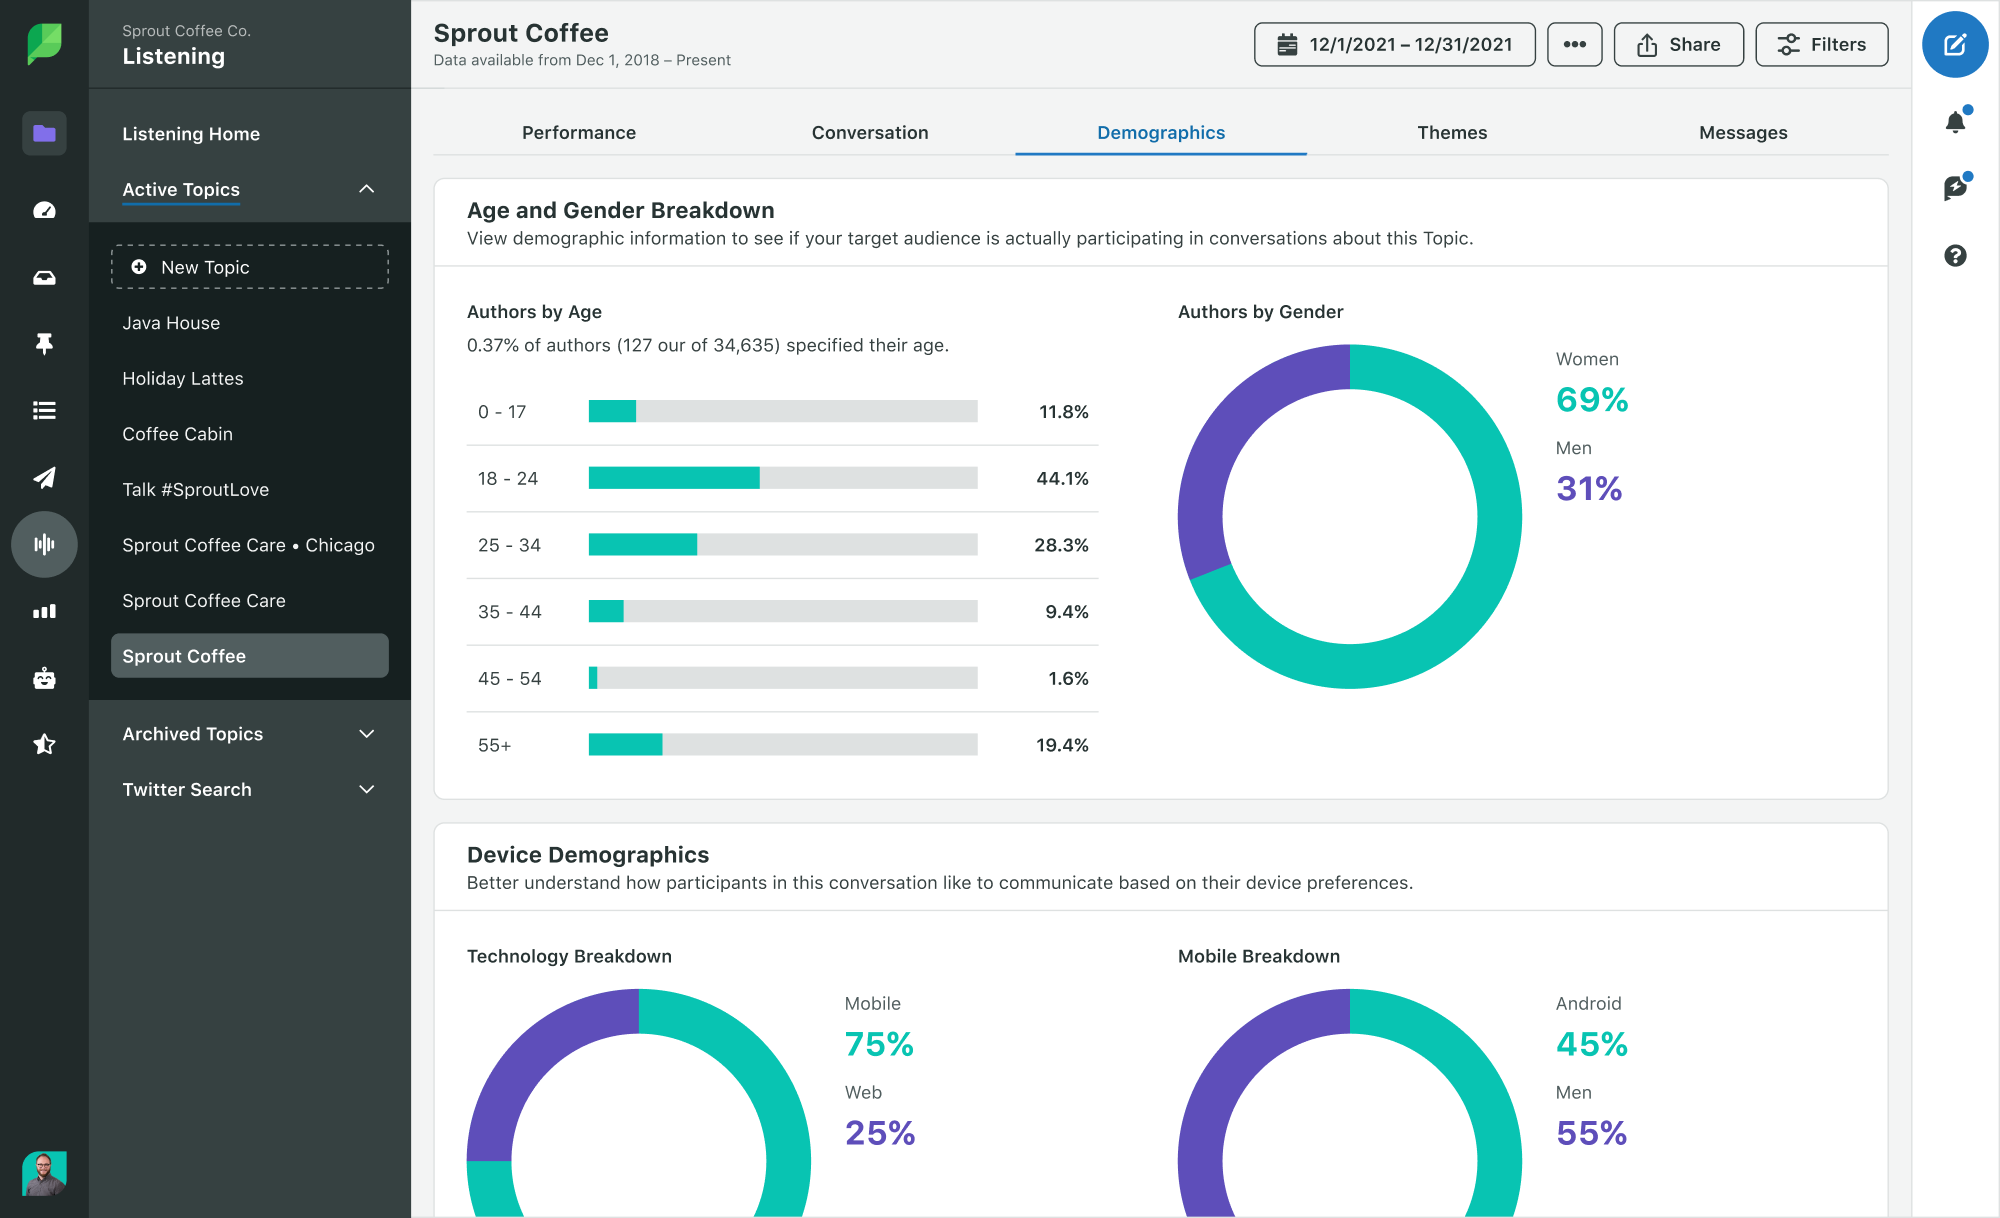
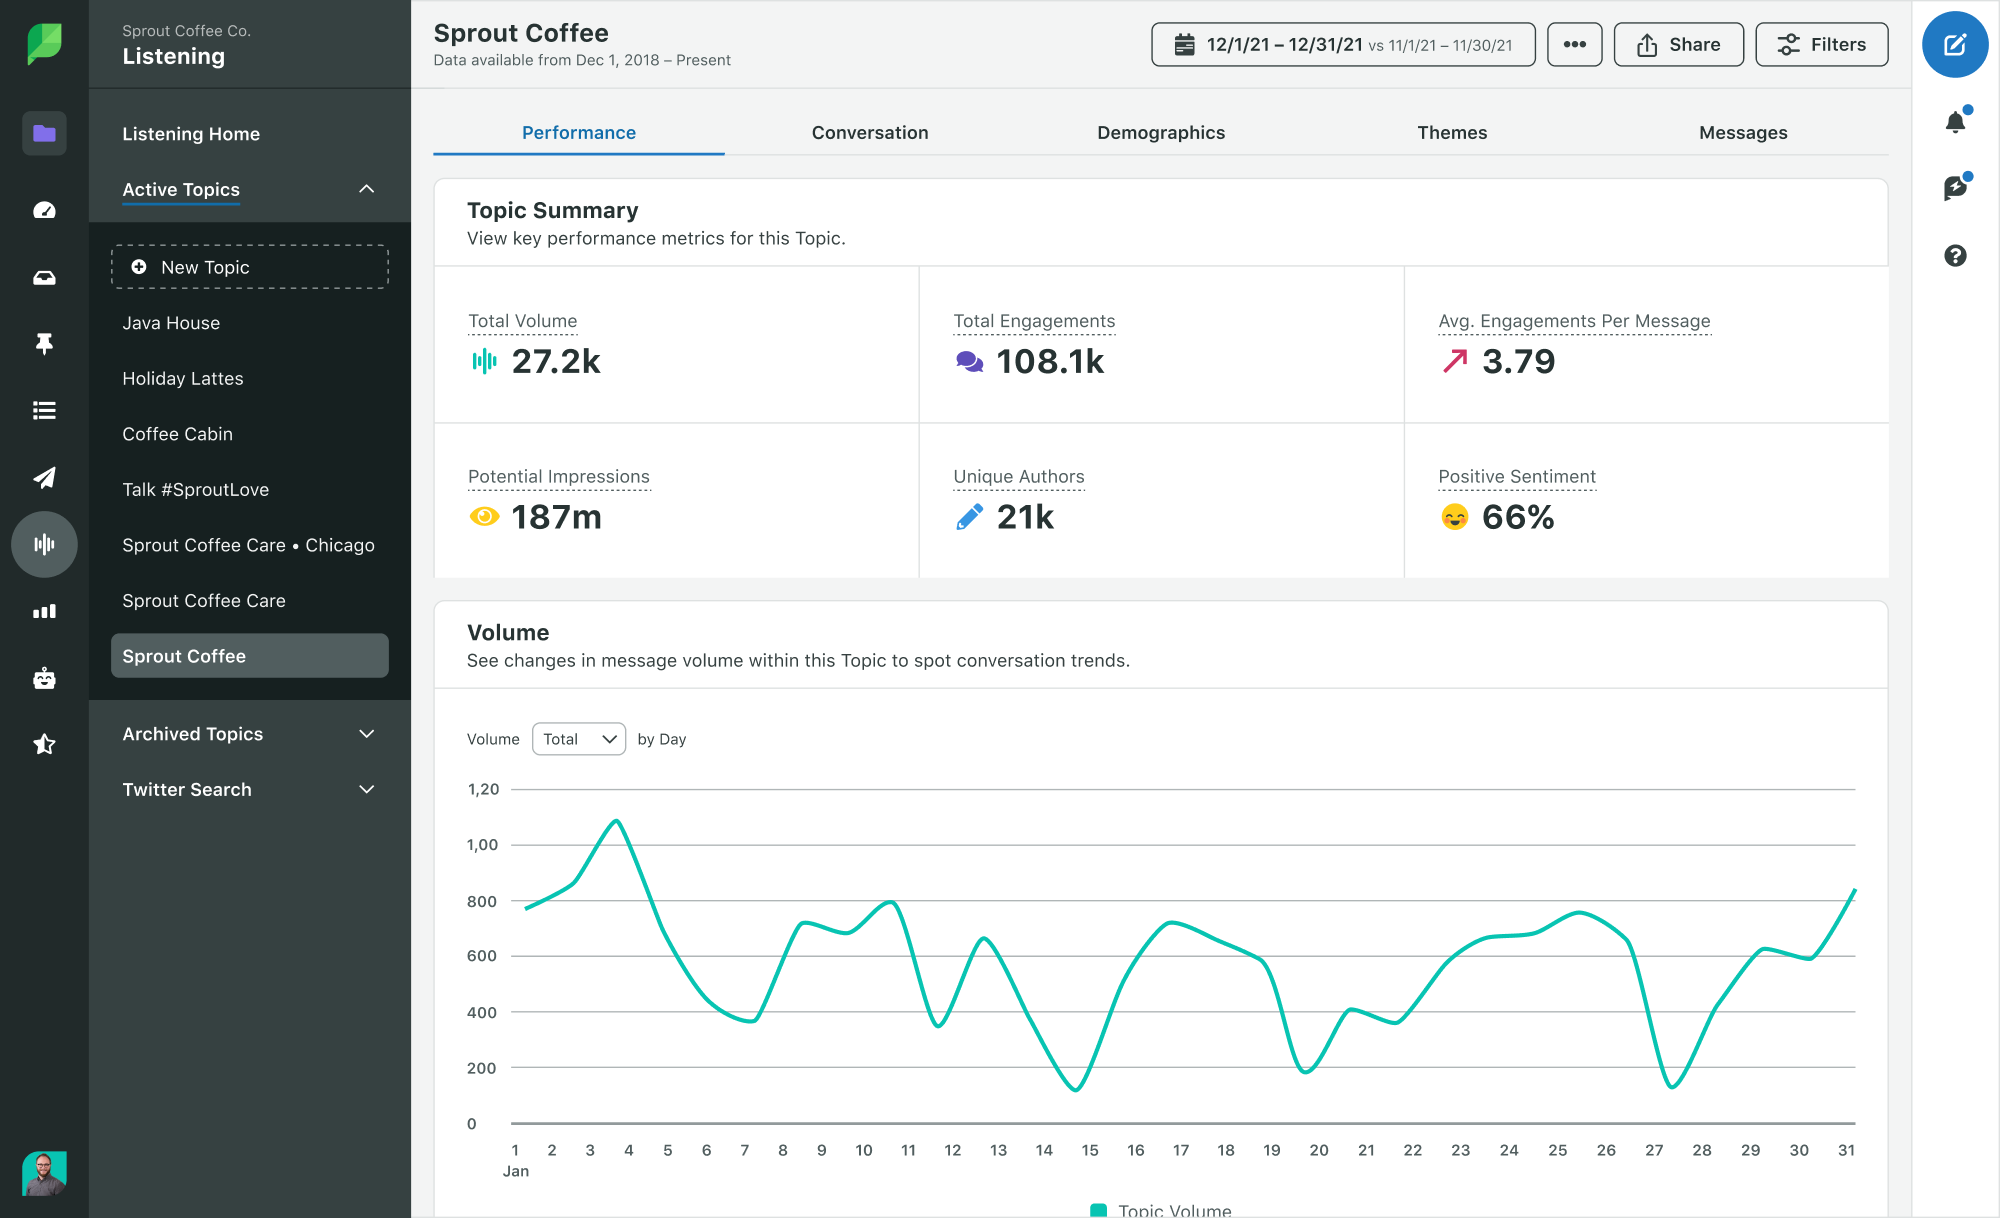
Using a social listening tool (like Sprout) helps you gather audience and sentiment data. All you need to do is create a Listening Topic on the outlet. From there, you’ll be able to tap into all the social conversations that are happening around their brand, from high-level conversation themes to demographic data broken down by age, gender and location.

3. Identify and validate creative pitch angles

Coming up with an interesting angle is by far the hardest part of the media relations process. You only get a few lines to grab someone’s interest. Finding that in a story that also furthers your brand presence can be tricky.

You’re probably already scanning daily news updates to find stories with potential brand alignment, but are you scanning social? Countless stories and trends break on social media every single day. If it’s not a major player in your news feed, you’re missing out.

Follow influencers in your industry across platforms to keep up with what people are talking about. Once you find an angle that shows promise, you can use social data to see if it’s worth pursuing.

Think of social listening as your one-stop shop for idea validation, whether that be for potential outlets or angles. In this case, you can set up a Listening Topic to determine conversation volume and identify high-profile individuals actively posting about the topic. If you spot any impressive numbers, work them into your pitch. That way, outlets can see the social impression potential they stand to gain by covering the topic.

4. Share press releases with a wider audience

Press releases aren’t only for the old newswire service anymore. Repurposing them for social is an excellent way to let your creativity shine. Let’s look at this example from DocuSign for inspiration.

DocuSign was recently named one of Glassdoor’s 2022 Best Places to Work. To celebrate, they put out a press release sharing details about the award, their employee feedback and their career opportunities. This formal statement works perfectly as a press release but on social, it would have been too dense to generate much engagement.

The DocuSign team used this as an opportunity to infuse some personality into the release. By sharing a link to the release alongside a video and punchier copy, they were able to promote the win in a way that creates additional buzz.

Next time you’re crafting a release, collaborate with your colleagues in social to see how it can be repurposed. Here are key things to consider:

  • The audience: Your message might be better suited to specific networks depending on your target audience. For example, news about your company’s work culture might be best suited for LinkedIn.
  • The tone: Social is a great channel for having some fun with your message. However, if you’re sharing news about serious topics (such as statements on political activities or current events), it’s best to err on the side of caution.
  • The message: If you have any extra sound bites, images or video clips that didn’t make it into your media pitch or press release, they might find a second life on social.

The dawn of social media relations is upon us

If work always stayed the same, it’d be way less interesting. Incorporating social media into your media relations strategy can revitalize your approach and help get your brand bigger and more impactful media placements.

If you’re new to the wild world of social data, don’t worry—the learning curve isn’t too steep. Use this social listening map for a crash course in building strategies around specific questions and goals. It will help you understand what kind of questions you can answer with your social data so you can better understand what information can support your work.

The post How to supercharge your media relations strategy with social appeared first on Sprout Social.


from Sprout Social https://ift.tt/5gN7lYR
via IFTTT