LinkedIn is a powerful marketing tool for any business, particularly in the B2B landscape. Over 82% of B2B marketers consider it a goldmine for generating high-quality leads, connecting with peers and building their professional network.
A strong presence on LinkedIn provides your business with a professional digital presence and an opportunity for your brand to be seen by 930 million members and 75 million businesses.
One of the key components of building your brand on LinkedIn is creating a LinkedIn Business Page. This page serves as a hub for your company to showcase your products or services, share valuable industry insights, and attract potential clients or employees.
If you’re new to LinkedIn or want to optimize your LinkedIn business page, we’ve created this resource for you. In this guide, we’ll walk you through six simple steps to create an engaging LinkedIn business page to help you stand out and achieve your business goals.
Table of contents:
- What is a LinkedIn Business Page?
- How to create a LinkedIn Business Page
- How to manage a LinkedIn Company Page
What is a LinkedIn Business Page?
A LinkedIn Business Page, or a Company Page, is a dedicated profile representing your company or organization on LinkedIn to members. It is a standalone profile (independent of the founder or employees) that serves as a digital presence for the company where people can learn more about it. This includes the latest news, updates, events, life at your company and job openings.
Unlike a personal profile page, a Business Page talks exclusively about your company and includes several customizable sections, such as Home, My Company, About, Products, Posts, Jobs, and People. This way, you can effectively use LinkedIn for your business marketing and build a professional image for your company while still adding a human element by featuring your team members
How to create a LinkedIn Business Page
Building your LinkedIn Business Page may seem confusing, but once you get the hang of it, it becomes a powerful tool for establishing your brand’s online presence and connecting to a vast network. You might be wondering how to get started, what information to include, and how to get started.
Follow these steps to create an optimized LinkedIn Page.
Step 1. Login to LinkedIn
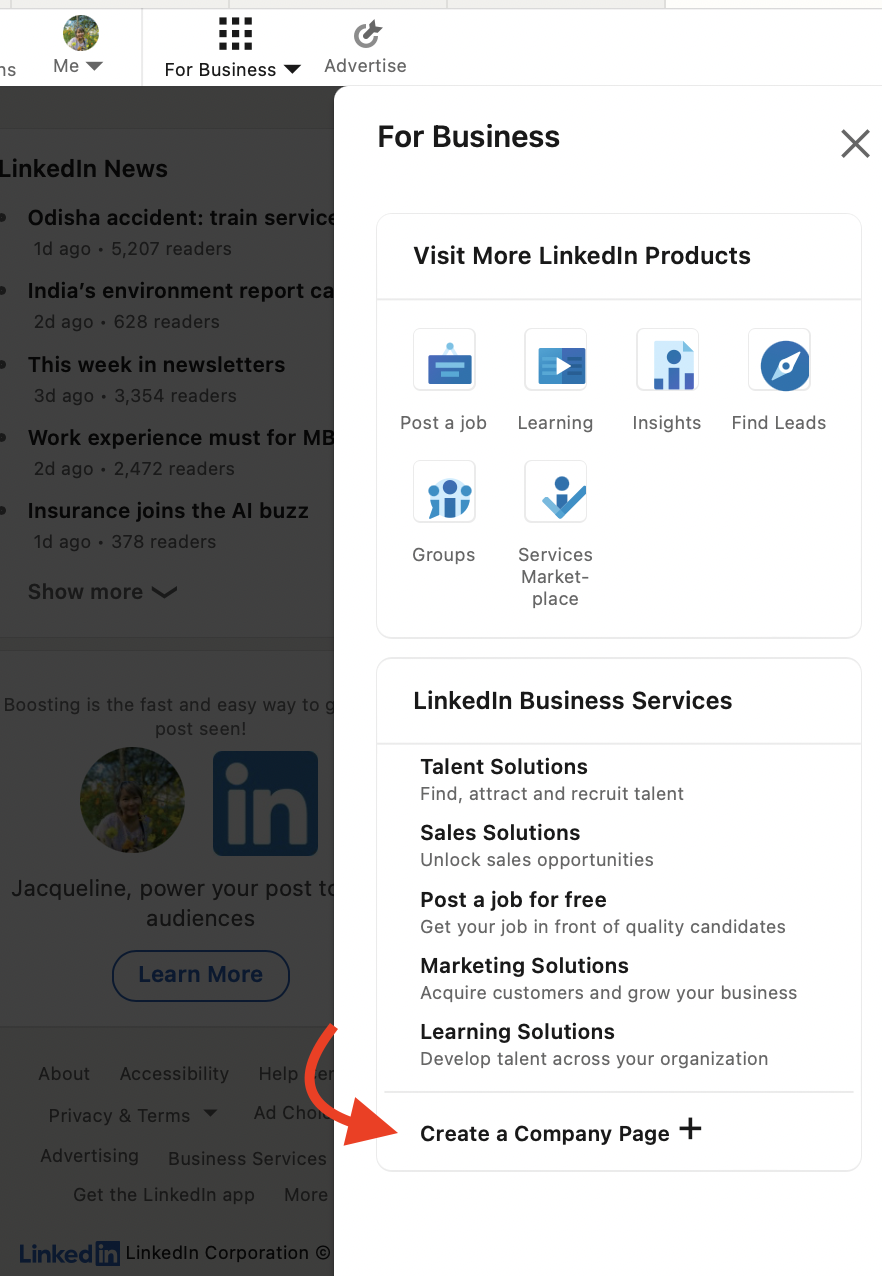
To create a LinkedIn Business Page, you must first be signed in to your personal profile. You need a personal account as an admin to create and manage your company page. On the navigation bar, click the “For business” dropdown to display multiple options. In the dropdown menu, navigate to the end of the list and select “Create a Company Page+.”
Step 2. Select a Page type to create
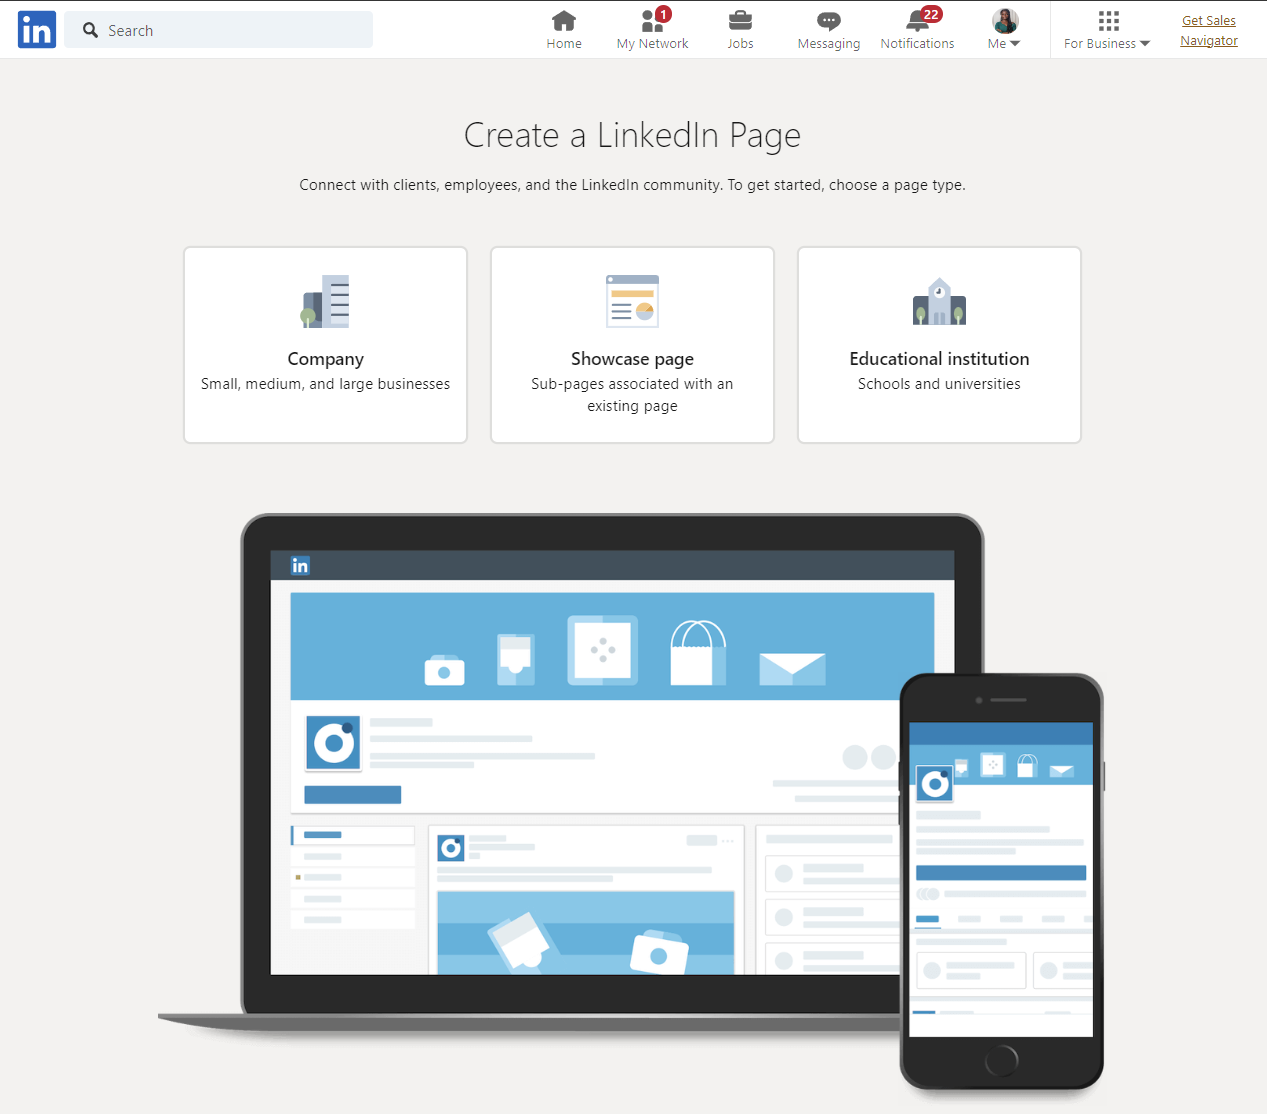
A new page comes up next with three different options for the type of page you want to create. You can choose either:
- Company Page: to build a new page for a small, medium, or large business that is non-educational.
- Showcase Page: to create a sub-page connected to an existing company page. Be careful not to choose this option if you’re building your LinkedIn page from scratch.
- Educational Institution: to build a page for school, university, or any other type of educational institution.
Select the option that best fits your organization; in this case we’ll select company.
Step 3. Fill in your Page identity
After clicking on the Company Page, a new page pops up where you are asked to fill in important information about your company. Pages with complete profile information get 30% more weekly views and are often favored by the LinkedIn algorithm.
The first three fields are for your company’s identification. This includes:
- Name: Type in your company’s name as you want it to appear on your company page. Be sure to include your company’s name to make it searchable.
- LinkedIn public URL:As you fill in your company’s name, LinkedIn will suggest a custom URL based on the inputted name for your company page. For instance, the URL for our Sprout Social Page is https://www.linkedin.com/company/sprout-social-inc-/. You can customize it to make it more unique and easy to remember.
- Website: Enter your company’s website. This shows up right on your profile and allows people to easily visit your website and learn more about your product when they want to.
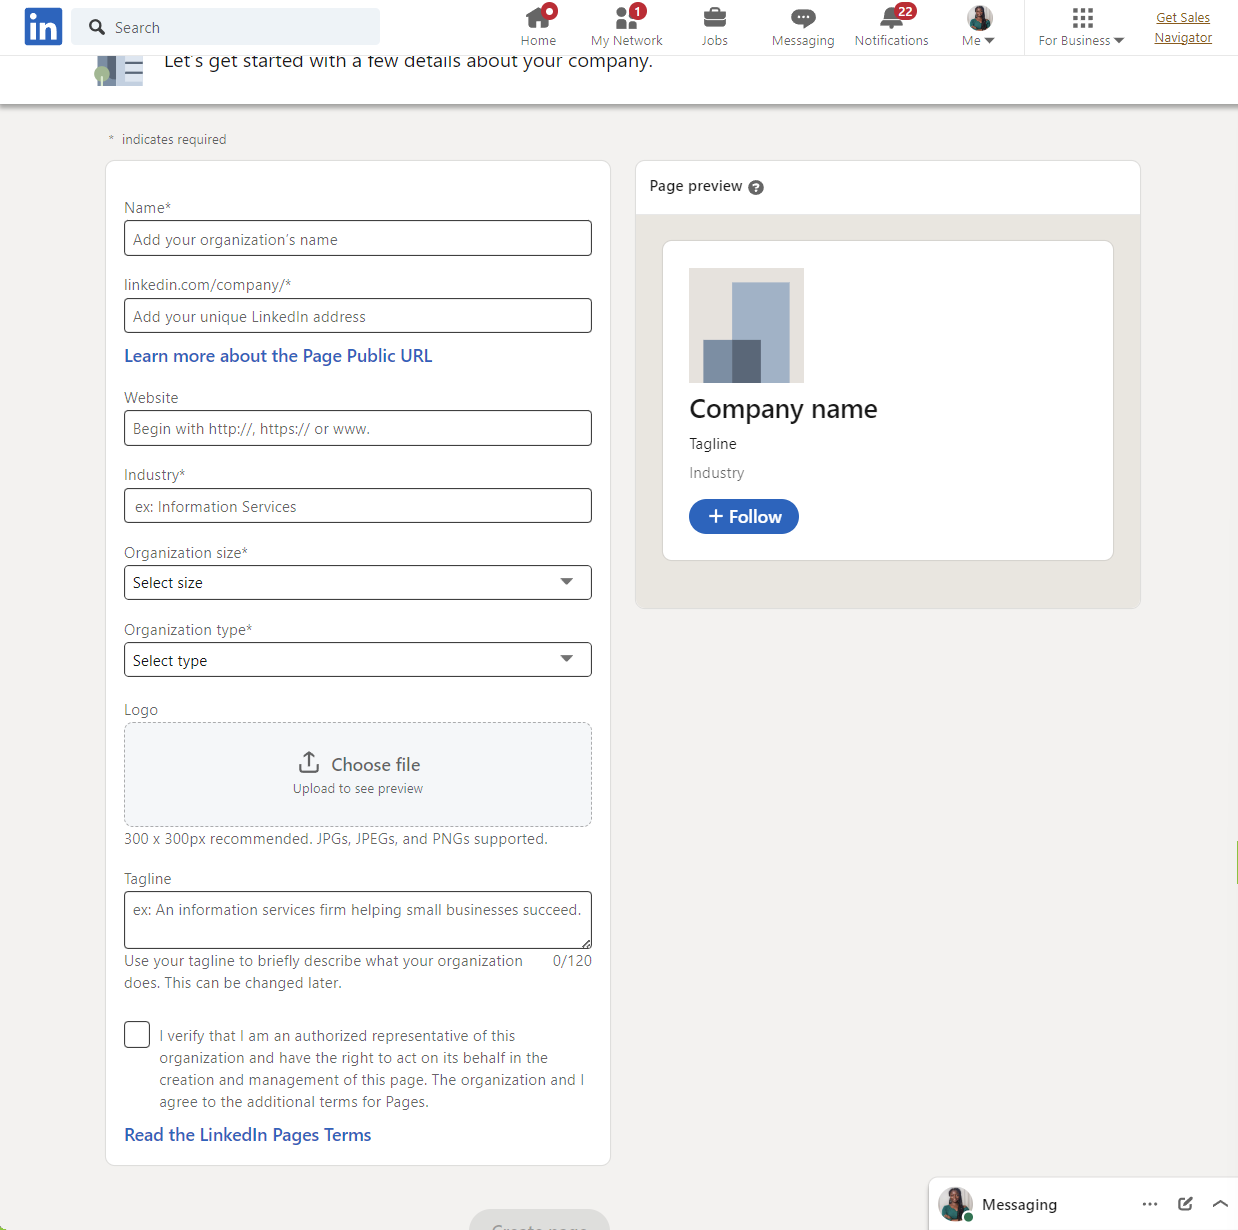
As you fill out this form, LinkedIn provides placeholder text as cues to guide users on what information to fill out in a particular field. Advanced features like conditional logic and field rules are also applied to prevent people from choosing an existing name option.
Step 4. Input your Company details
Next, you must fill in additional company information. LinkedIn requires these details to properly understand and categorize your company so people can easily find you.
- Industry: Type in your industry and pick from LinkedIn’s lists. This will help LinkedIn properly categorize your business and recommend it to users interested in that particular industry. Choose something closely related if you can’t find your specific industry on the list.
- Company size: Pick your company size depending on your current number of employees. LinkedIn uses this to categorize companies as small, medium, or large businesses and personalize their offerings.
- Company type: Select the type of organization your company is. Options provided are public company, self-employed, Government agency, nonprofit, sole proprietorship, privately held and partnership. If you aren’t sure, reach out to confirm.
Ensure to fill in the correct information in the three fields, as they’re all required. Remember, the more optimized your profile is, the better its chances of performing.
Step 5. Upload a logo and tagline
The next step is uploading your company’s logo. LinkedIn recommends that the logo size be 300 x 300 pixels, and the file must be in JPG, JPEG, or PNG.
On LinkedIn, your company’s logo is a critical component that must be rooted in your brand’s personality. Use a color palette that compliments your brand personality, conveys specific emotions to your target audience and stays true to your vision and industry.
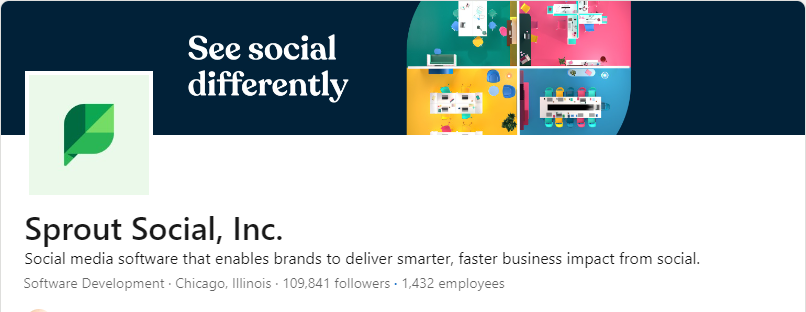
Next, enter your tagline which will be included right below your name and logo. Simply put, your company’s tagline is the short form of your Unique Selling Proposition (USP). The whole idea is to sell your company’s benefits in a matter of minutes as soon as they land on your company’s profile.
LinkedIn’s tagline has a character limit of 120 characters, so it’s best to keep it concise. Aim for brevity, avoid using slang and maintain a professional tone.
Once you’re done, read and check the verification box to confirm you have the right to act on behalf of the company. Then click on the “Create Page” button, and voila, your LinkedIn page is created.

Step 6. Fill out your LinkedIn profile
After creating your business page, you’ll be redirected to a new page. This is where you have to complete your company’s profile. Right on top is a meter reflecting your progress as you complete more sections and action cards representing incomplete page sections under the meter.
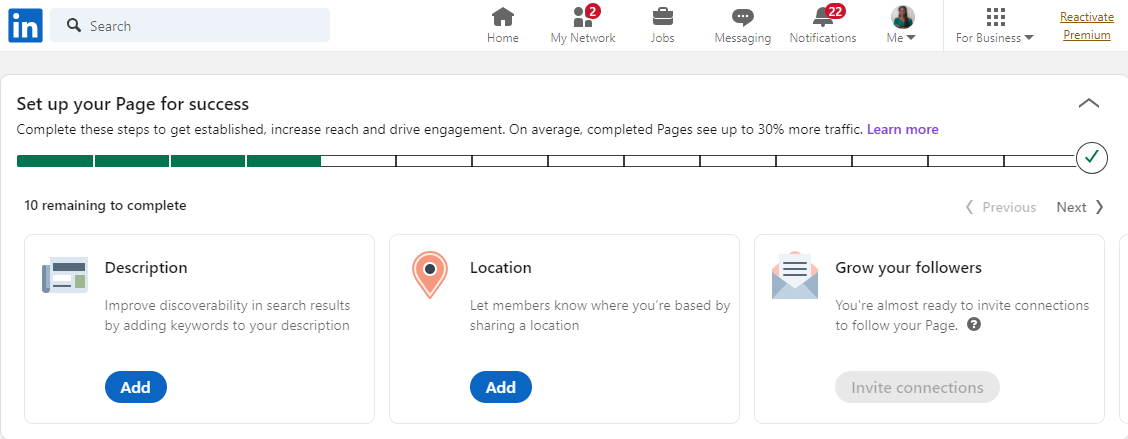
Now, you can start editing your page and filling in information. Let’s discuss what each section is about.
About
The About section appears “above the fold” when users check out your product. This is the place to highlight a brief overview of your company, including your story, mission, values and what sets you apart.
Canva’s About statement opens up with a clear and concise mission statement that immediately sets the tone for its goal. The section also touches on the company’s history, a comprehensive list of its product offerings, its long-term vision, values and positive impact on the world.
You should also note that the About section also displays your website, industry, company size, headquarters and specialties which include your company’s keywords.
Product
Although relatively new, LinkedIn’s Product Page was made with the aim of helping companies showcase their products. Check out Zoom’s LinkedIn Product Page.
According to LinkedIn, you can have up to 10 additional products, arranged alphabetically, that summarize the product description, its category and the connections with the product as a skill.
If you click on any product, the product page opens up. Here, you can display more specific information about the product, like a product description, product media and connections who use the product.
Life
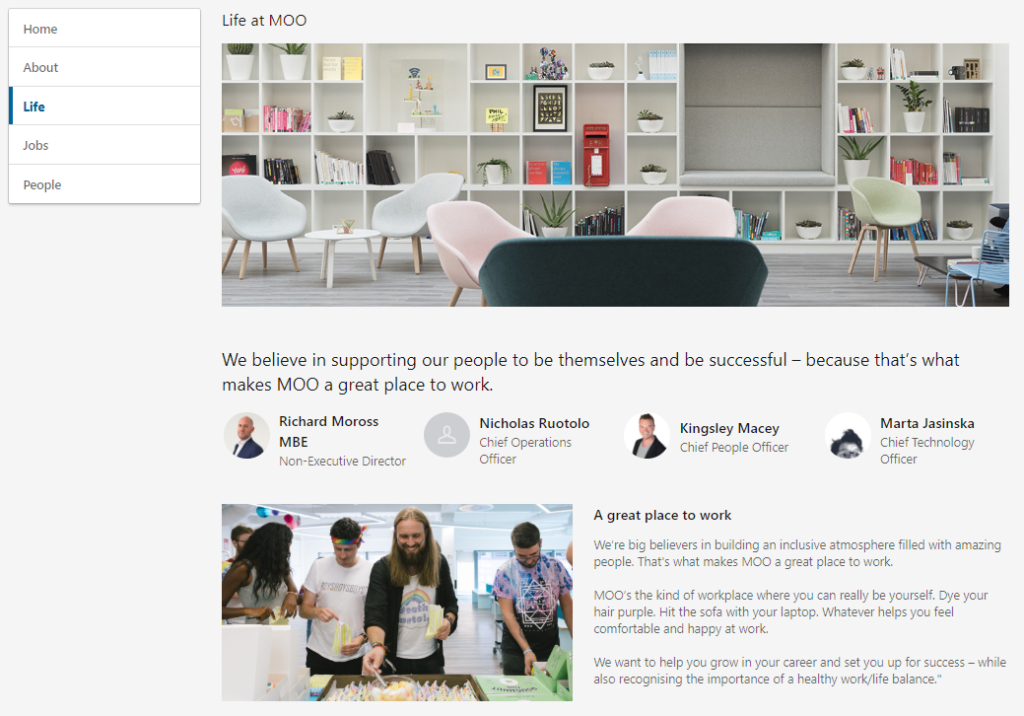
Leverage the Life section on LinkedIn to provide information about your company’s culture. Here, you can find information about company leaders, culture highlights, photos of employees and testimonials from clients and employees.
Jobs
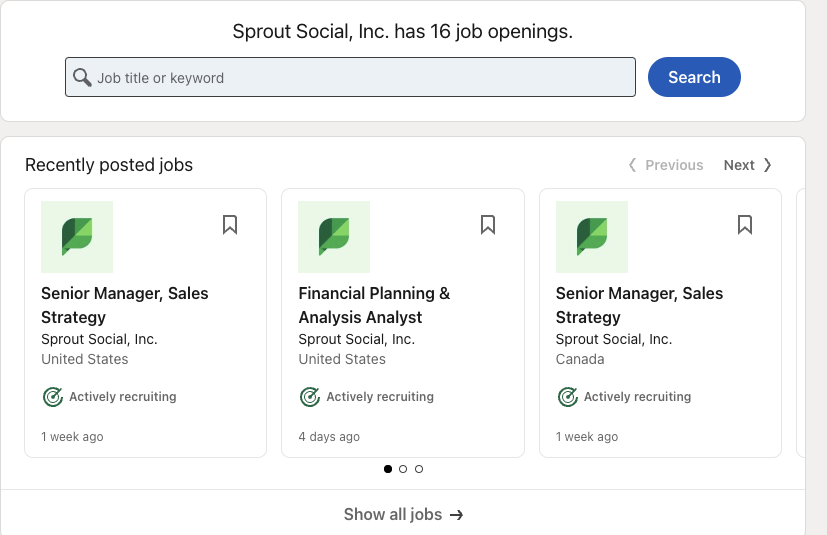
The jobs section shows a compilation of all open roles in your organization.
People
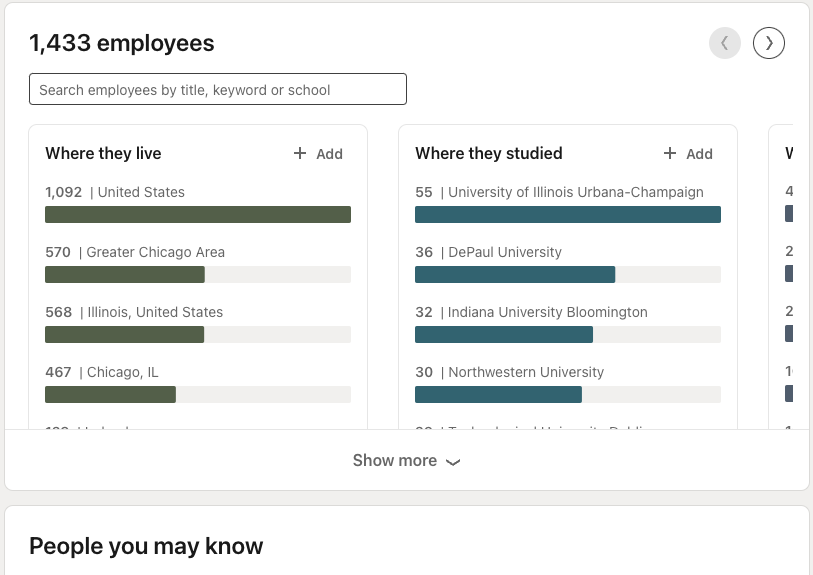
The People tab on your LinkedIn Page is a directory of all current employees currently working for that company. This section includes the employee’s name, job title, and location. Admins can customize this section by adding a header, subheader, call to action, or showing their employee’s qualifications.
There’s also an “Employee distribution” graph that displays the number of employees a company has in different locations and which is more dominant.
How to manage a LinkedIn Company Page
Creating the Company Page doesn’t mean the work is done. As with any social platform, it takes time to build an audience and a presence with the right strategy. But that’s not to say that it can’t be done.
There are two ways to manage your LinkedIn company page. First, you can manage your page Natively on LinkedIn via Page Admins or use a more effective tool like Sprout Social. Let’s take a look at both in detail.
Natively in LinkedIn via Page Admins
To manage your LinkedIn page, you first need Admin access to the page. Here’s how to do that.
1. Log in to your LinkedIn account and navigate to your homepage.
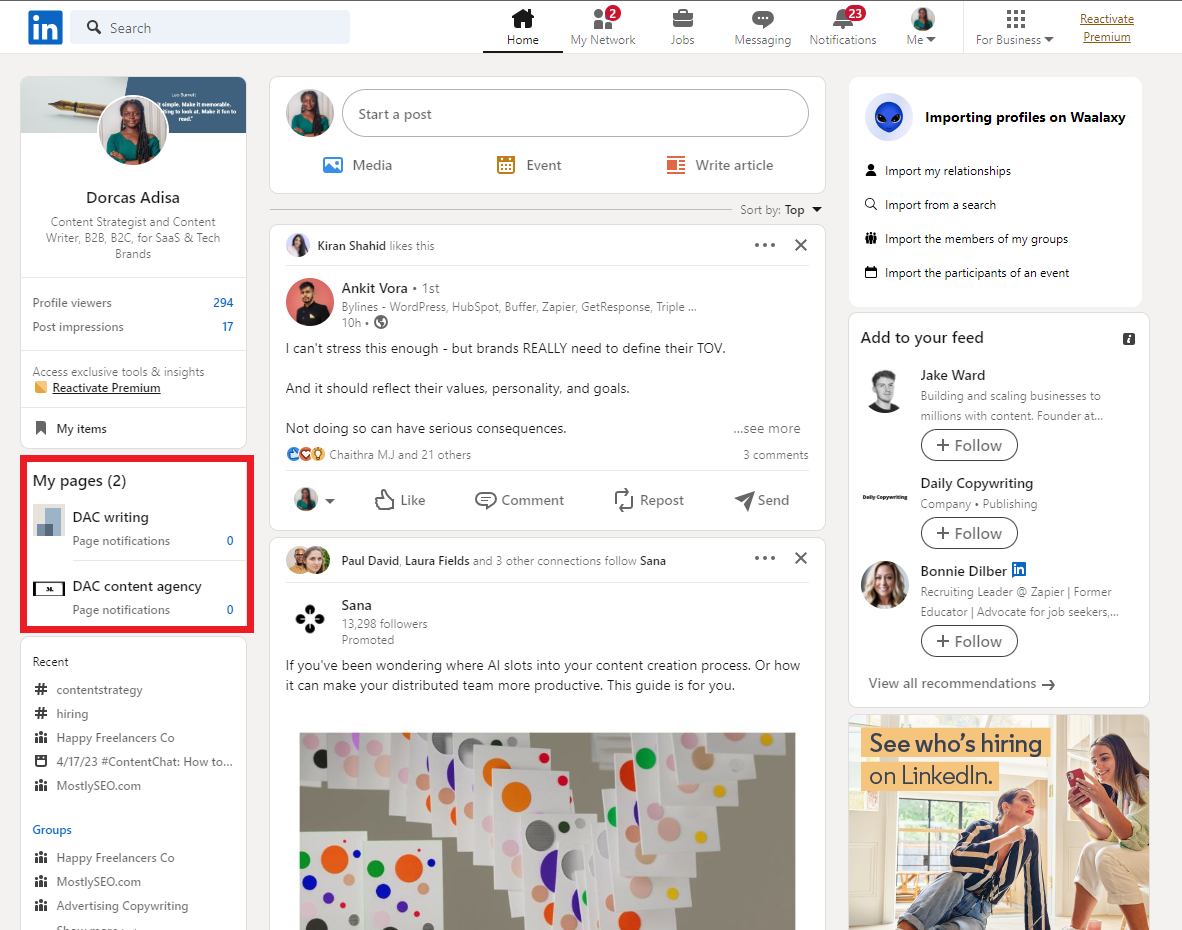
2. On the left side of your LinkedIn homepage, you’ll see a My Pages section. This section shows every page you’re an admin of on LinkedIn. Click on the correct page you want to manage from the list.
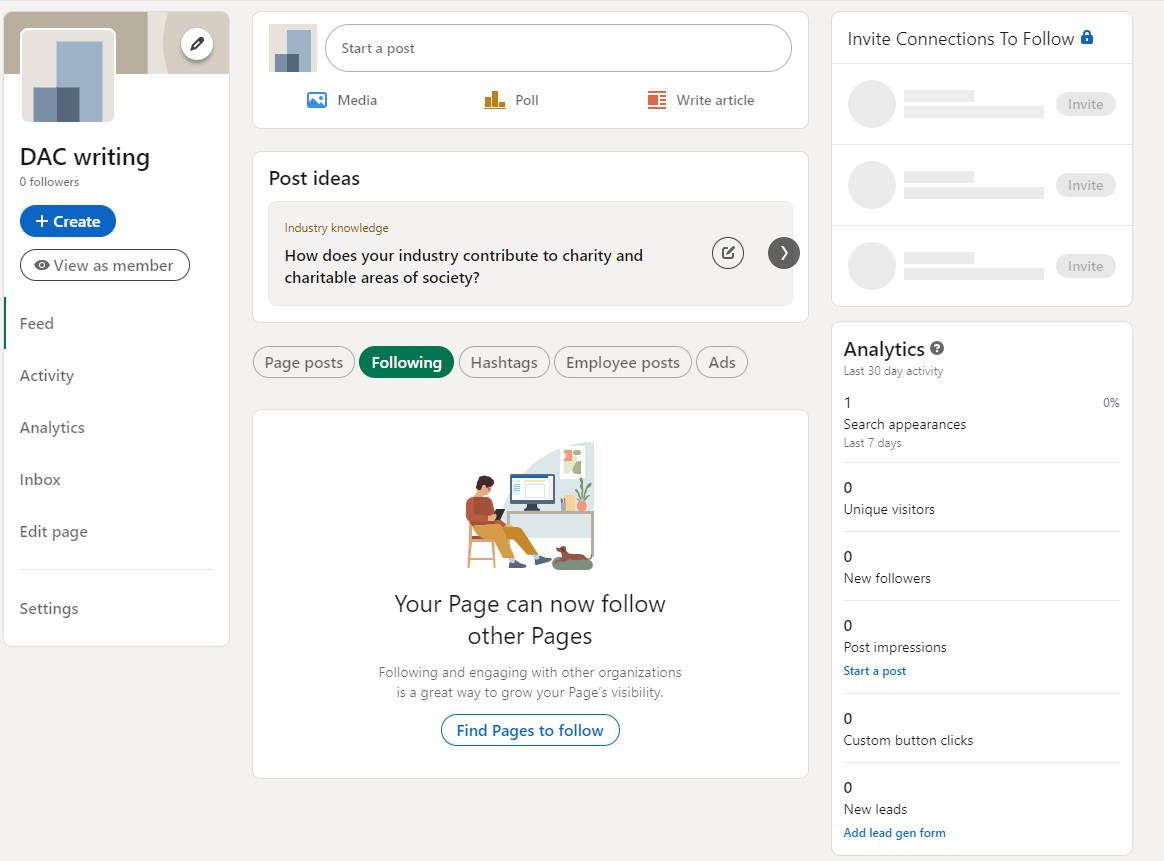
3.You’ll be redirected to an admin page where you can complete your profile and manage everything, including your Feed, Activities on your page (comments, mentions, reactions, or reposts), and your LinkedIn Analytics.
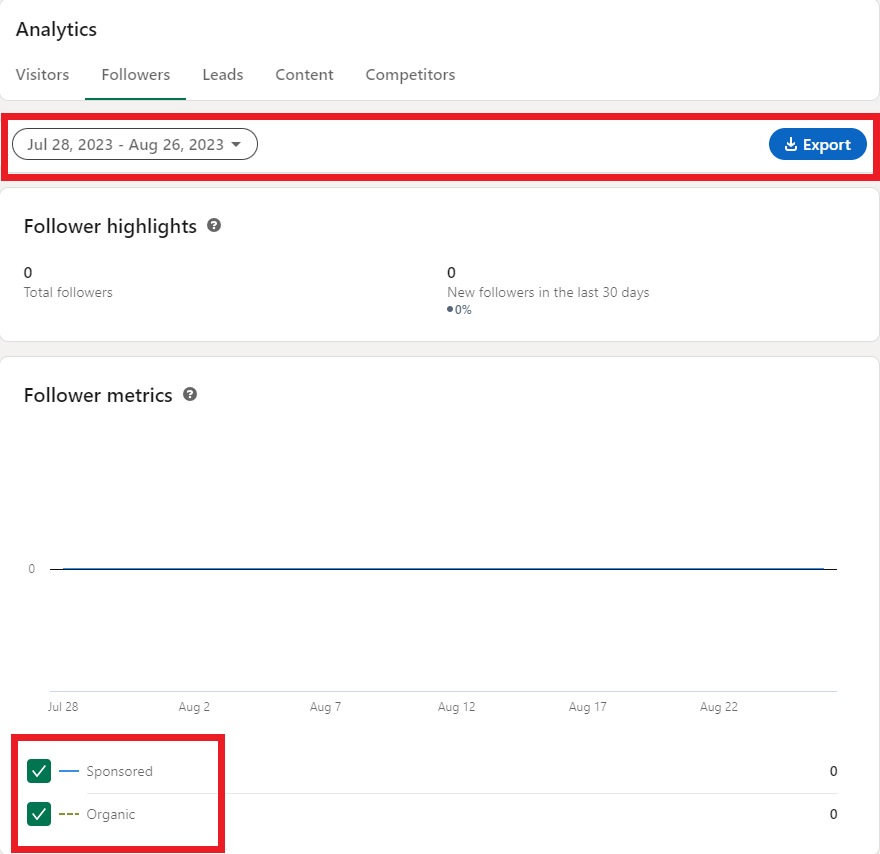
4. Monitor your LinkedIn analytics using the in-built analytics tool. You can track data on the number of visitors, followers, leads, content, and even competitors. Filter by date, type (sponsored or organic), and demographics, then you can export your report.
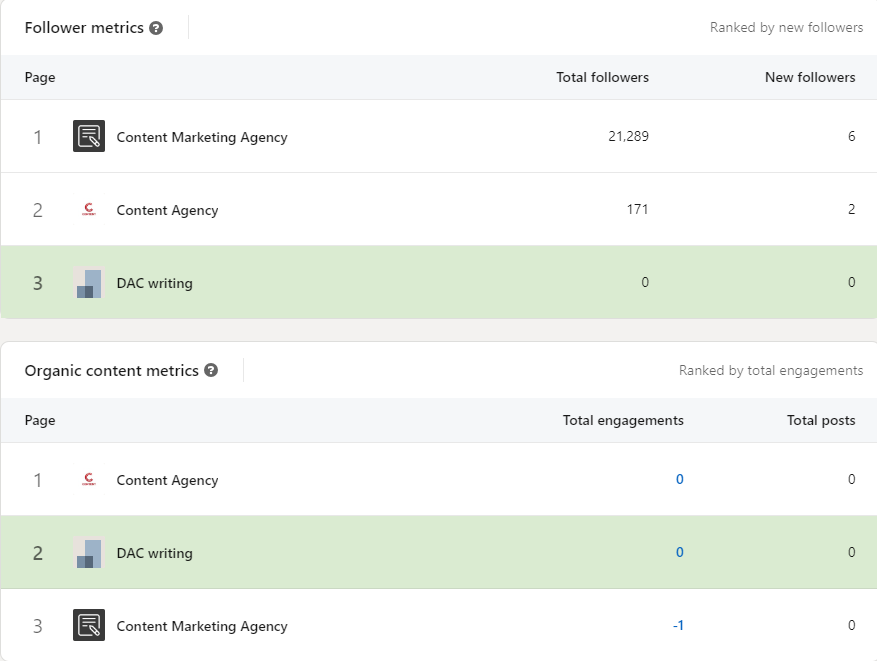
5. You can add multiple competitors to your page and monitor their follower metrics, organic content metrics and trending competitor posts.
Use a LinkedIn management tool such as Sprout Social
A better way to manage your LinkedIn company page is to use Sprout Social. Chances are, you’re probably marketing your business on social media, and you need a tool to effectively manage all your social channels on one platform, even LinkedIn.
Let’s take a look at how to use Sprout Social to manage your LinkedIn Business page and some of the benefits that Sprout Social offers.
1. Schedule your LinkedIn posts ahead of time and create a LinkedIn calendar
After writing your LinkedIn post, you can publish it immediately or schedule it in a queue to go out later.
Although there’s a native LinkedIn scheduler, several limitations may hinder your ability to schedule effectively. For instance, you can’t tag people or other pages, and there are limited posting options for articles, newsletters, etc.
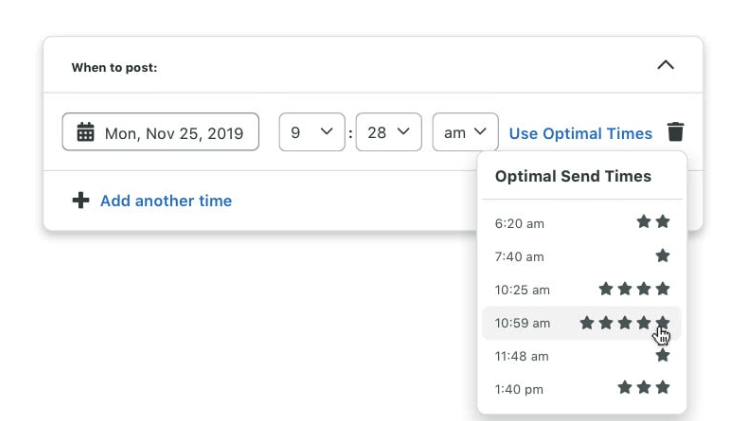
Sprout offers advanced scheduling features like auto-schedule with Sprout Queue and ViralPosts to pick optimal times when your audience is most active on LinkedIn.
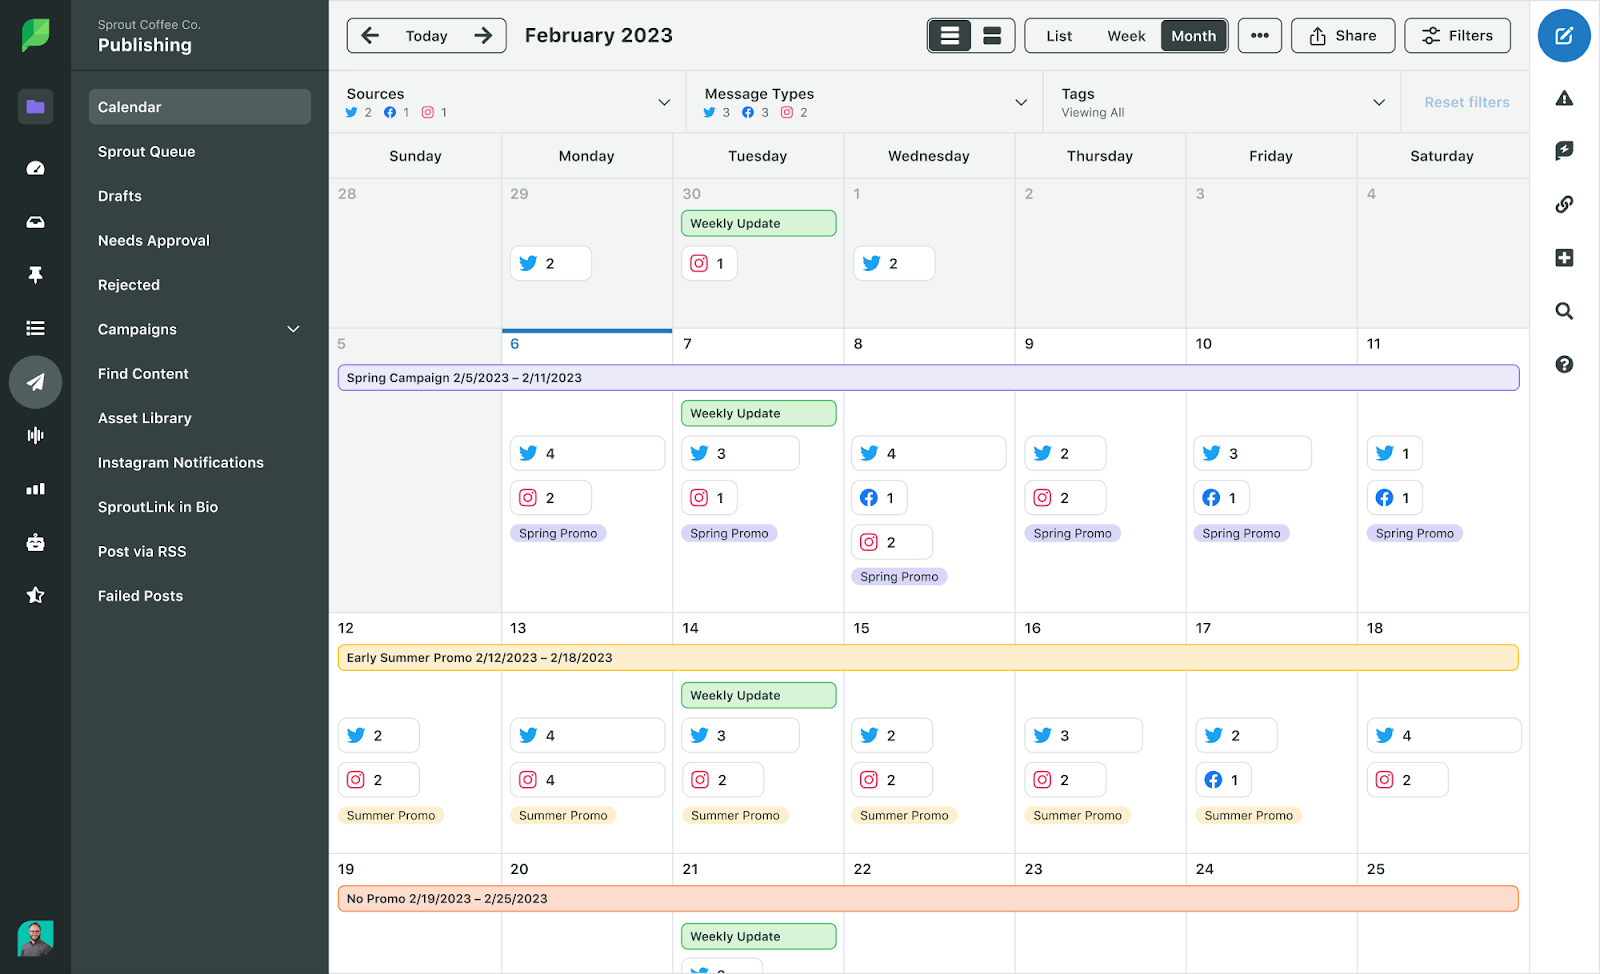
All your scheduled posts appear on the scheduled date on the social media calendar, not just for LinkedIn.
2. Organize and store brand assets in the asset library
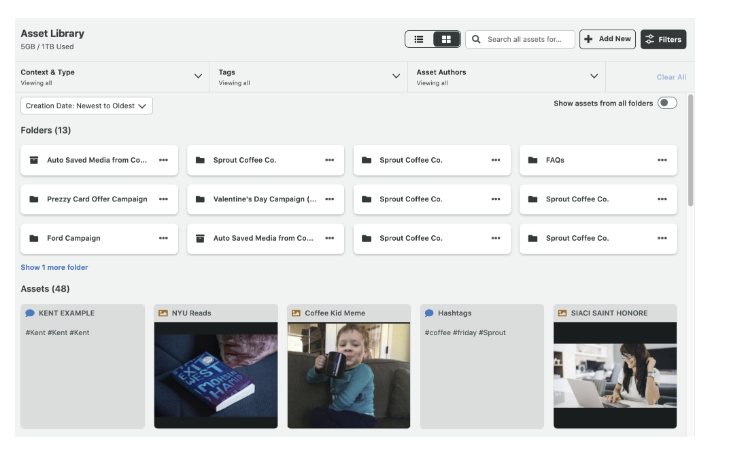
With Sprout Social’s Asset library, you can store, organize and categorize your brand assets to enable team members to stay focused and aligned with the pre-approved content available. Think of this as an internal knowledge base that’s efficient for information retrieval, fosters collaboration amongst team members and prevents loss of information.
3. Collaborate with team members
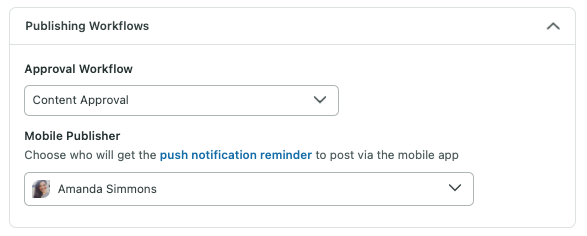
On Sprout’s dashboard, you can collaborate with team members effectively. For instance, you can set up approval permissions for collaboration and approval before publishing a post to your LinkedIn page. You can also tag your messages to group and categorize posts based on your workflow.
4. Track and analyze your LinkedIn analytics
Sprout provides in-depth LinkedIn analytics to assess the effectiveness of your LinkedIn marketing efforts. You can track data on engagement, keep tabs on follower growth, learn about your audience and monitor post performance for organic and sponsored posts. Generate comprehensive reports or create customized reports to track specific metrics that matter most to your business goals.
Start taking advantage of LinkedIn Business page tools
Your LinkedIn Business Page is a valuable resource for establishing a strong online presence for your company. Creating an effective one requires careful planning and execution. In this guide, we’ve outlined steps to help you optimize your page and attract a wider audience of potential clients.
For more detailed guidance on using LinkedIn for business, download our LinkedIn strategy template. In there, you’ll find in-depth tips, recommendations and strategies for building your brand on LinkedIn.
The post How to create an effective LinkedIn Business Page in 6 steps appeared first on Sprout Social.
from Sprout Social https://ift.tt/EsAJrQi
via IFTTT
No comments:
Post a Comment