Disclosure: This content is reader-supported, which means if you click on some of our links that we may earn a commission.
Everything is ready.
You’ve decided your niche, thought of blog topics—perhaps even developed it—and have started optimizing the content you plan publishing to drive organic traffic.
You have elaborate plans for your website and strategies for putting them into effect.
But…
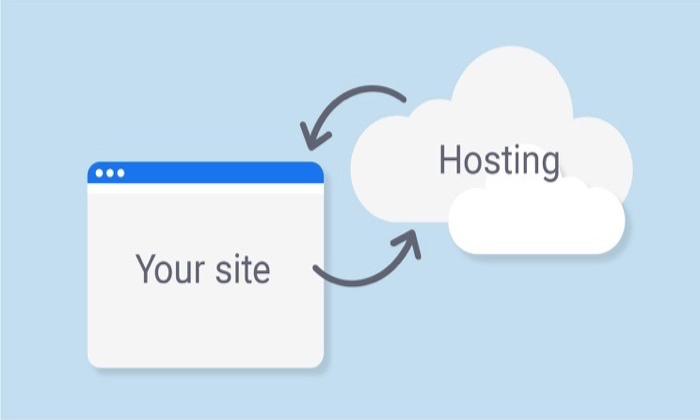
If you want others to see your website, it must be hosted.
It’s the only way to get your site published on the internet.
But what does web hosting mean?
Think of it as renting space on a server to hold your website files. You need a domain name (I’ll discuss this in more detail later) that will point the server to your website’s location.
The whole process of getting your website live may already sound terrifying to first-timers. But it really isn’t scary!
All you need is the right guidance to show you how to host a website—something that I plan on doing.
No matter the type of website you want to create, you’ll be able to host it easily with my step-by-step tutorial.
Your 2-Minute Cheat Sheet
This section is your shortcut to success. I’ll explain everything you need to know briefly.
Start by researching a good web hosting provider. I recommend Dreamhost, Hostinger, and Bluehost, as I found them reliable and speedy. Not to forget the excellent customer service they offer, too!

Want more options? Don’t worry. There are several other alternatives that you can try out. Head over to our best web hosting service guide to find the right fit for you.
Next, you have to work on registering an available domain name.
Here, you have two options: Either buy a domain name from the same hosting service or get one from a third-party provider—your call.
Follow this up by choosing the hosting type you want and a hosting plan to go with it. From cloud hosting to dedicated hosting to shared hosting—the choice is difficult but not when you know what you want.
For instance, if you’re on a tight budget, shared hosting would be more practical. But if you’re a large company experiencing high traffic volumes daily, dedicated hosting would be better.
All that’s left is to do is change your DNS address and upload your website.
Congratulations! You now have a live website up and running.
That was the gist. Let’s dig into these steps in a bit more detail now.
Step 1: Choose a Web Hosting Provider
When you want to buy a house, what would you do? How will you approach the situation?
You wouldn’t just buy the very first property you see when driving down the street.
No, you would do thorough research.
You would contact different real estate agents, check out all kinds of properties, see what fits within your budget, and find out everything you should know to make the right decision.
The same logic applies to web hosting.
Let me make one thing clear: No web hosting provider is the same. Some are better than others.
How do you know which one is the right fit for you?
If you plan on turning to Google and simply typing “best web host,” you’ll only end up getting more confused than before.

There are tons—1,330,000,000, to be more precise—of articles on the internet. And what makes it worse is that not all of them offer the right advice.
You need to know the right research process and eliminate unsuitable options ASAP. As someone who has been in this line for decades, I’ve compiled a list of the best web host providers in my experience.
While you can check out my methodology in this guide, here are a few of my top picks:
There are many others. Go through all the options and their features and pricing to determine the right fit for you.
Step 2: Register a Domain Name
Remember when I mentioned that a domain name points the server to your website files’ location on the internet?
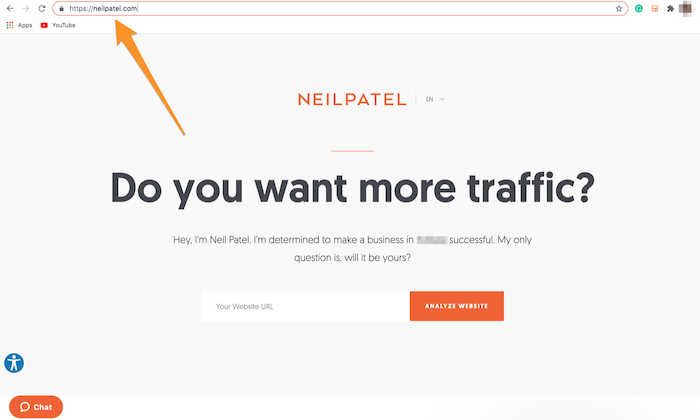
Simply put, your domain name is your digital address. My domain name is NeilPatel.com, but you don’t have to use your name. You could keep anything you want—provided it’s available for registration.
The good news is you can get a domain from your web host provider itself. For instance, Bluehost offers free domains to its users who sign up for its subscription plans.
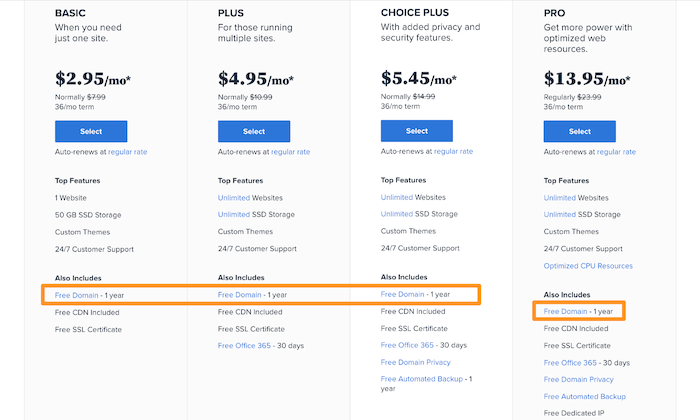
Some providers will give you a domain for a small upcharge.
Do you want even more options? Great, because I have another.
You may buy a domain name from a third party who is not your web host provider.
There are quite a few hosting providers who don’t sell domain names as they specialize in hosting products exclusively. In those cases, you’ll have to purchase a domain before using the hosting service.
Here’s my take on this: It’s better to buy hosting and domain name together. It’s simpler, hassle-free, and less time-consuming.
On the other hand, when you buy a domain name and hosting service separately, extra steps are involved. You’ll have to set the Name Servers on the domain registrar’s website to point to the address provided by your web host.
It’s best to consult with your registrar for more instructions since it varies from one site to another.
Once you have your domain name in place, you can move forward in the process of getting your website live on the web.
Step 3: Select the Type of Web Hosting You Want
We’ve discussed web host providers and domain names. Next on the list should be to determine the type of hosting you think would be best for your website.
I’m going to briefly talk about these hosting types to give you a basic idea of what you can expect from each.
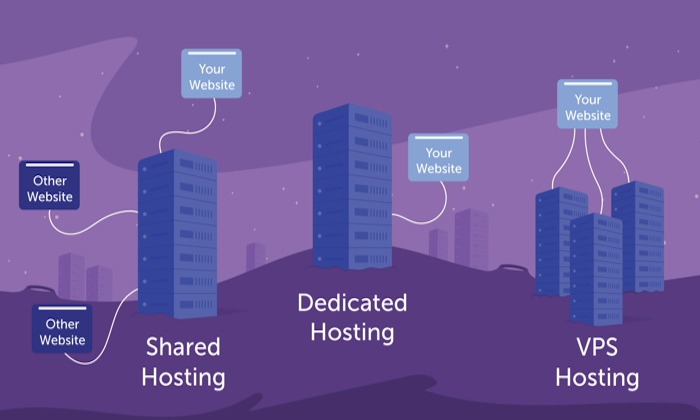
There are four main options:
- Shared hosting
- VPS hosting
- Dedicated hosting
- Cloud hosting
Shared Hosting
This hosting option is best for small businesses, small websites, and personal blogs. In other words, people who are just starting out.
It allows multiple websites to share the same server resources, which is what makes it more affordable. This also means you might have to deal with slow loading times.
I would recommend shared hosting if you’re on a budget, don’t have tons of technical knowledge, and don’t expect high traffic volumes.
VPS Hosting
VPS stands for virtual private service. It’s a type of shared hosting in a sense, with the only difference being you get access to a flexible set of resources, making it easier to handle large traffic spikes.
Think of it as the more advanced version of shared hosting.
You get better site performance under this hosting type as you get your own “virtual” server that includes your dedicated resources. Expect more bandwidth, disk space, higher uptimes, and faster loading speeds.
Basically, you have more control over your server settings.
I would recommend this option if you expect higher volumes of traffic, and hence, need additional resources to accommodate those visitors.
Dedicated Hosting
As the name suggests, a dedicated server hosting gives you the entire server—one that’s dedicated to your website exclusively.
You can enjoy all server resources, advanced tools to manage your server better, and have the option to install your own software and operating system.
Beware, you will need some technical skills for this hosting type.
I feel dedicated hosting is a better option for larger websites that want a high performance to tackle higher traffic volume without compromising loading speed.
It’ll also be more suitable for those who are tech-savvy and can afford to pay the higher price tag.
Cloud Hosting
Even hosting plans need to accommodate the changing times, which is why we now have a cloud web hosting option.
Cloud hosting comes between shared hosting and VPS. While you get better services than a shared service, it’s also cheaper than a VPS plan.
In this case, your site will be run on multiple cloud servers, decreasing the chances of having unexpected downtimes due to server problems or traffic surges.
This hosting type is ideal for growing websites that need to scale server resources as they get bigger. If you expect your website to surpass 50,000 monthly visitors, I’d encourage you to choose a cloud plan.
Step 4: Choose a Good Hosting Plan
Now that you know the hosting type you want, you need to look for viable hosting plans that offer solutions at a price point that meets your budget.
I’m going to assume you already have a budget in mind and will straightaway start discussing factors you should consider when vetting hosting plans.
Uptime
Probably the most crucial feature that you should consider is uptime.
I’m going to cut to the chase: If your hosting provider isn’t offering a minimum of 99.9% uptime, move on.
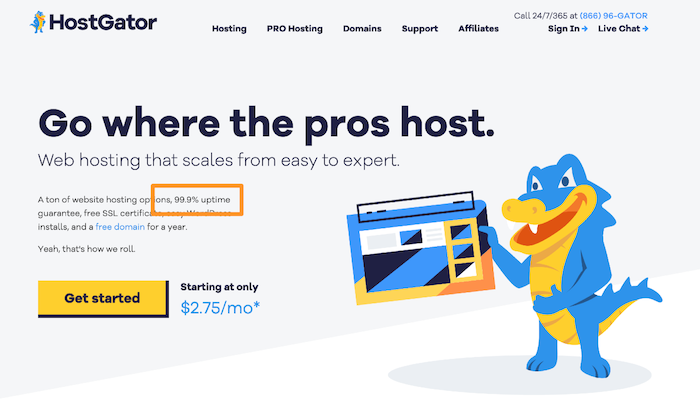
What’s more, you’ll find plenty of web hosts that offer an uptime guarantee in their plans. This means that whenever they fail to meet the promise, they’ll end up compensating you.
Customer Support
Not many people consider the level of customer support offered by a web host provider, which is a mistake.
Thinking that nothing will go wrong with your website or server is just wishful thinking. It’s during these times of trouble that you should have instant help. Try to look for plans that offer 24/7 support by a live chat, phone, or email.
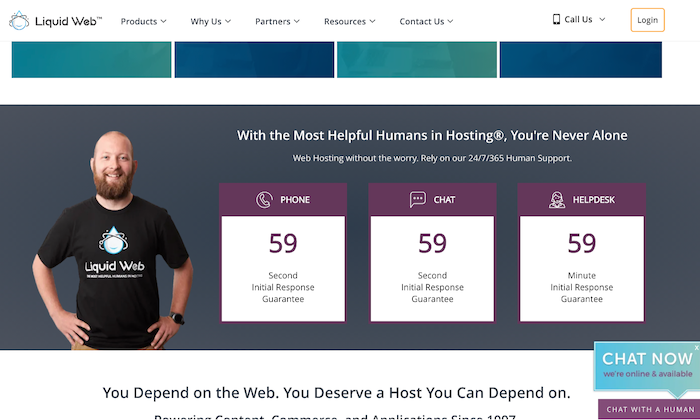
Another tip would be to look for web host providers that have a knowledge base and resource center. This way, you can teach yourself how to do specific tasks on their platform.
Resources
Look for plans that come with enough resources to accommodate your website content and traffic.
The very first that you should do is look at the RAM storage. I would minimum at least a minimum of 4GB RAM. Consider the bandwidth next. Again, 120GB of bandwidth is enough for 2000 daily page loads of a 4GB website.
Talk to your provider to better understand the resources you’d need based on your requirements.
Additional Features
Your main aim should be to get a web hosting plan that provides you the best value for your money. And the best way to maximize value is to get freebies, add-ons, and other additional features.
Here are a few things to look for:
- Free site migration
- Free SSL certificate
- Free cPanel license
- Free site builder
- Unlimited email accounts
- Automatic backups
- Google ads credit
- Bing ads credit
While the above features are optional, I’d encourage you to only opt for those plans that have a money-back guarantee. Thirty days is the industry standard, but you can find plans with a 60-day or 90-day guarantee as well.
Step 5: Change Your DNS Address
After purchasing your web hosting, you will get name servers, also known as Domain Name Servers (DNS). These are the internet equivalent of a phone book that will contain IP addresses.
You have to change the name servers of your domain. Here’s how to do this:
- Go to your Domain Control Panel.
- Enter your registered email address and password that you used when signing up for the web host provider.
- Click on the domain name that you want to change the name servers for.
- In the Domain Registration section, click on the Name Servers option and replace the existing name servers with the ones provided by your current web host.
The steps will be slightly different if you register your domain is with a third-party provider.
In that case, you’ll have to log in to their Control Panel and update the domain names to the ones provided by your web host.
That’s it! All that’s left to do is upload your website to your account, and your website will be live and running.
Conclusion
Hosting a website doesn’t have to be overly complicated.
You must start by finding the right web host provider and choose your hosting type and plan. Then simply prepare yourself to handle a live website!
As for the domain name, you can either choose a web host provider that offers a free domain or sign up for one with a third party—the choice is yours!
Which web host provider is your favorite and has given you the best results?
The post How to Host a Website appeared first on Neil Patel.
from Blog – Neil Patel https://ift.tt/3qV7Ifz
via IFTTT
No comments:
Post a Comment